Since joining the Brown CS dept technical staff in 2015 I'd been contemplating the possibilities offered by the wall shelves in my office. I had dabbled in model railroading before college took over my life, and I still had my entire HO scale train collection as well as a lot of track and scenery materials lying around at home. Turning one of the shelves into a static model train display seemed like a nice way to blow off steam (pun not intended) during lunch breaks.
This project had no fixed schedule and sometimes I only had an hour to spare for it out of a whole work week, but that was sort of the point, that it be an exercise in patience.
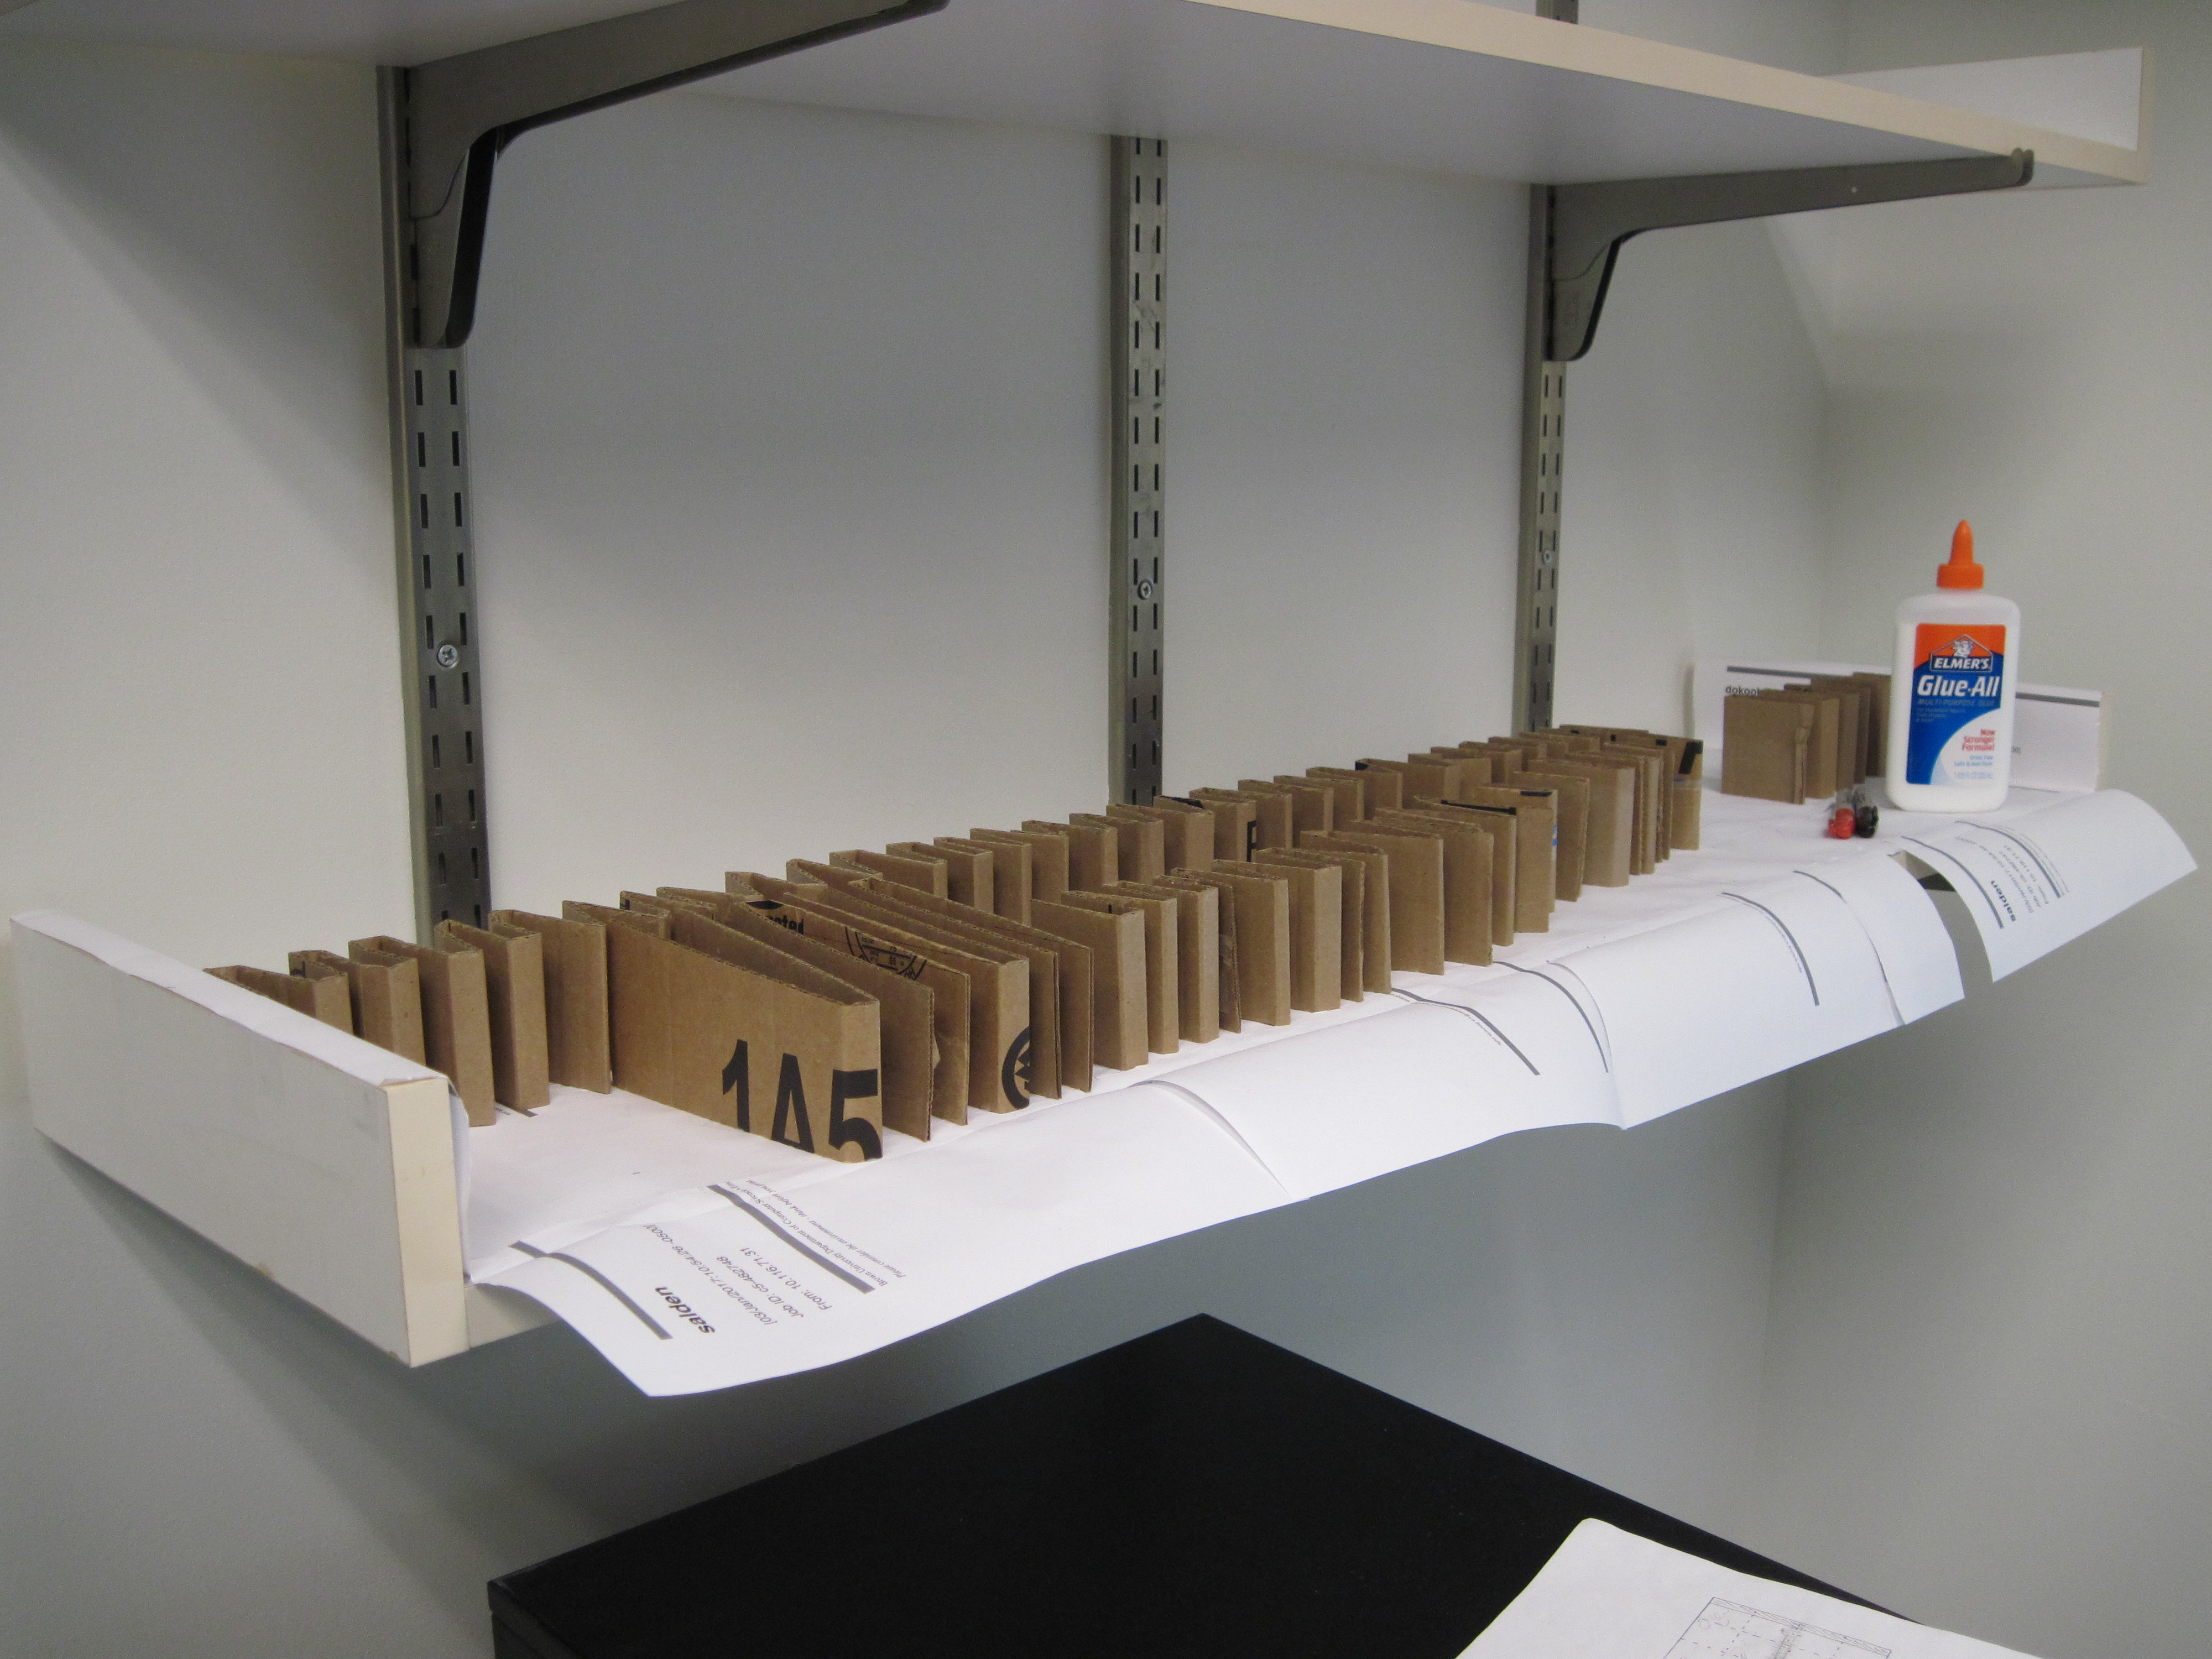
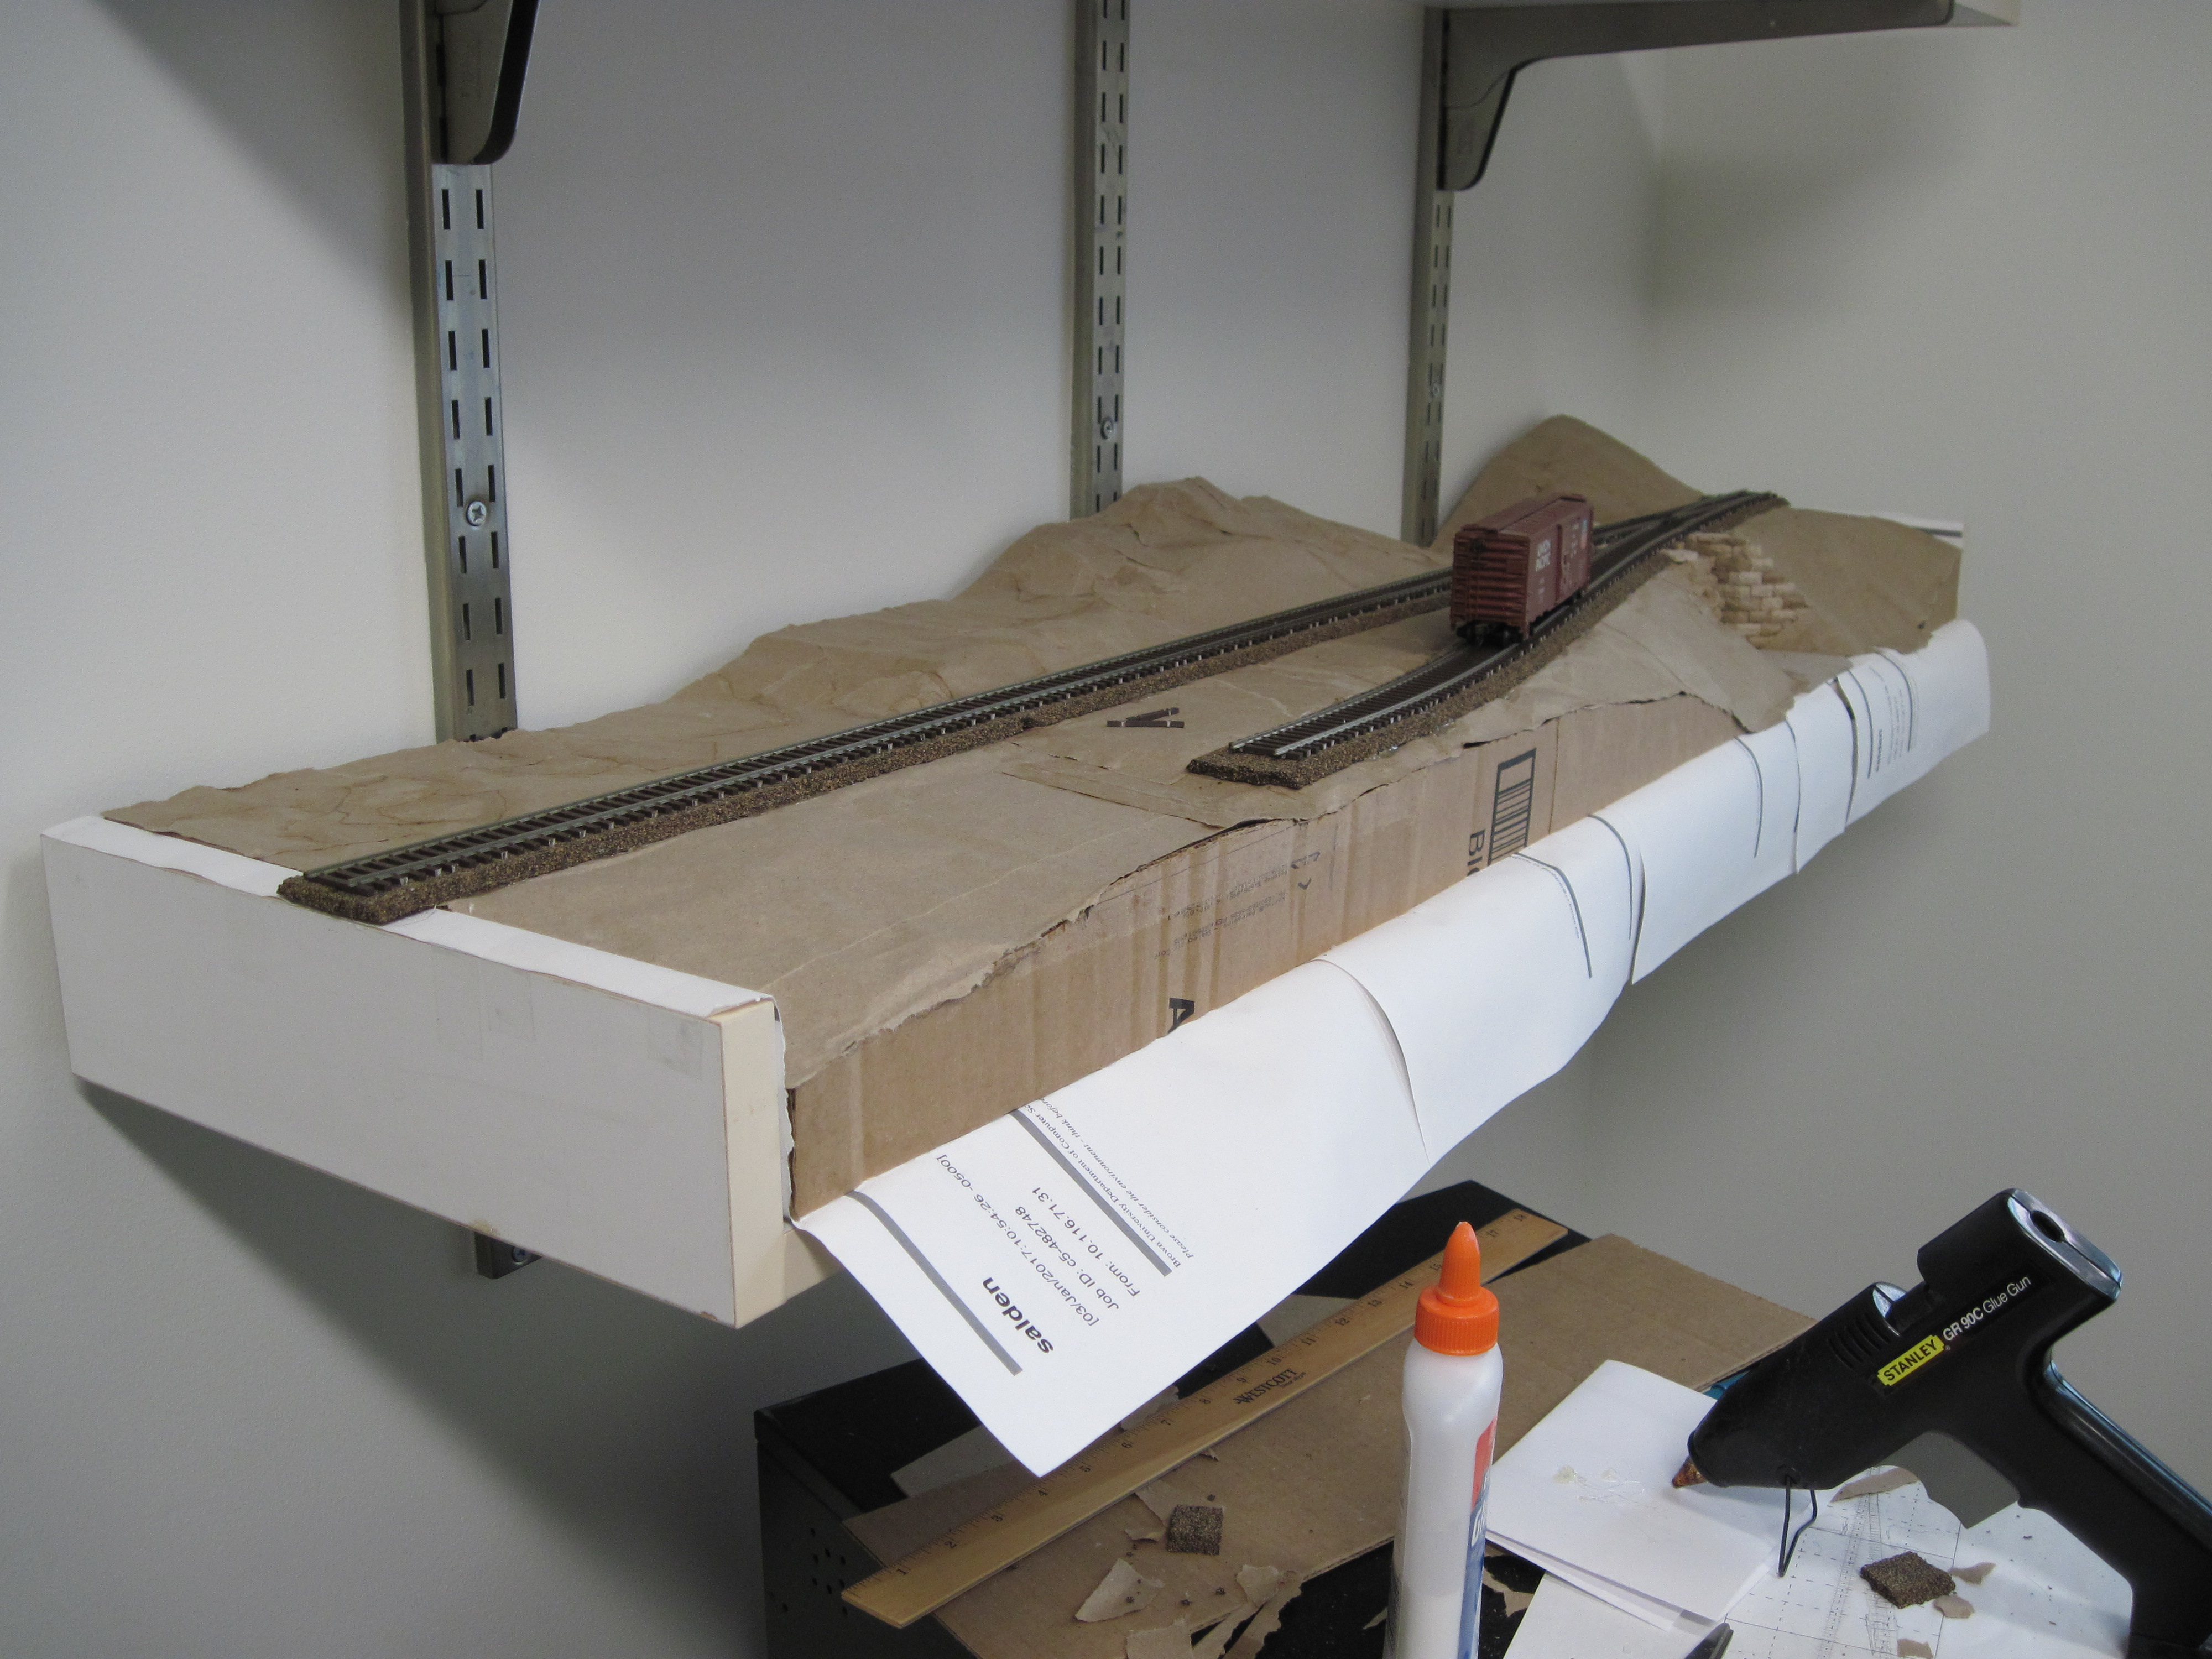
The shelf is 1 ft. deep and 3 ft. 10.5 in. long - actually 4 ft. long if you go past the lip at either end. The first step is to build up the contour of the landscape. There are many ways of doing this, and this isn't necessarily the best or the most popular way of doing it, but it works. You can see that there will be a main line and a siding, a road crossing the main line at the left, and a brook at the right. There's a lot more of the landscape to be filled in, but this was the portion where accuracy was important.
To give a better idea of what it will ultimately look like, I took a picture with the track and a train in approximately the right position.
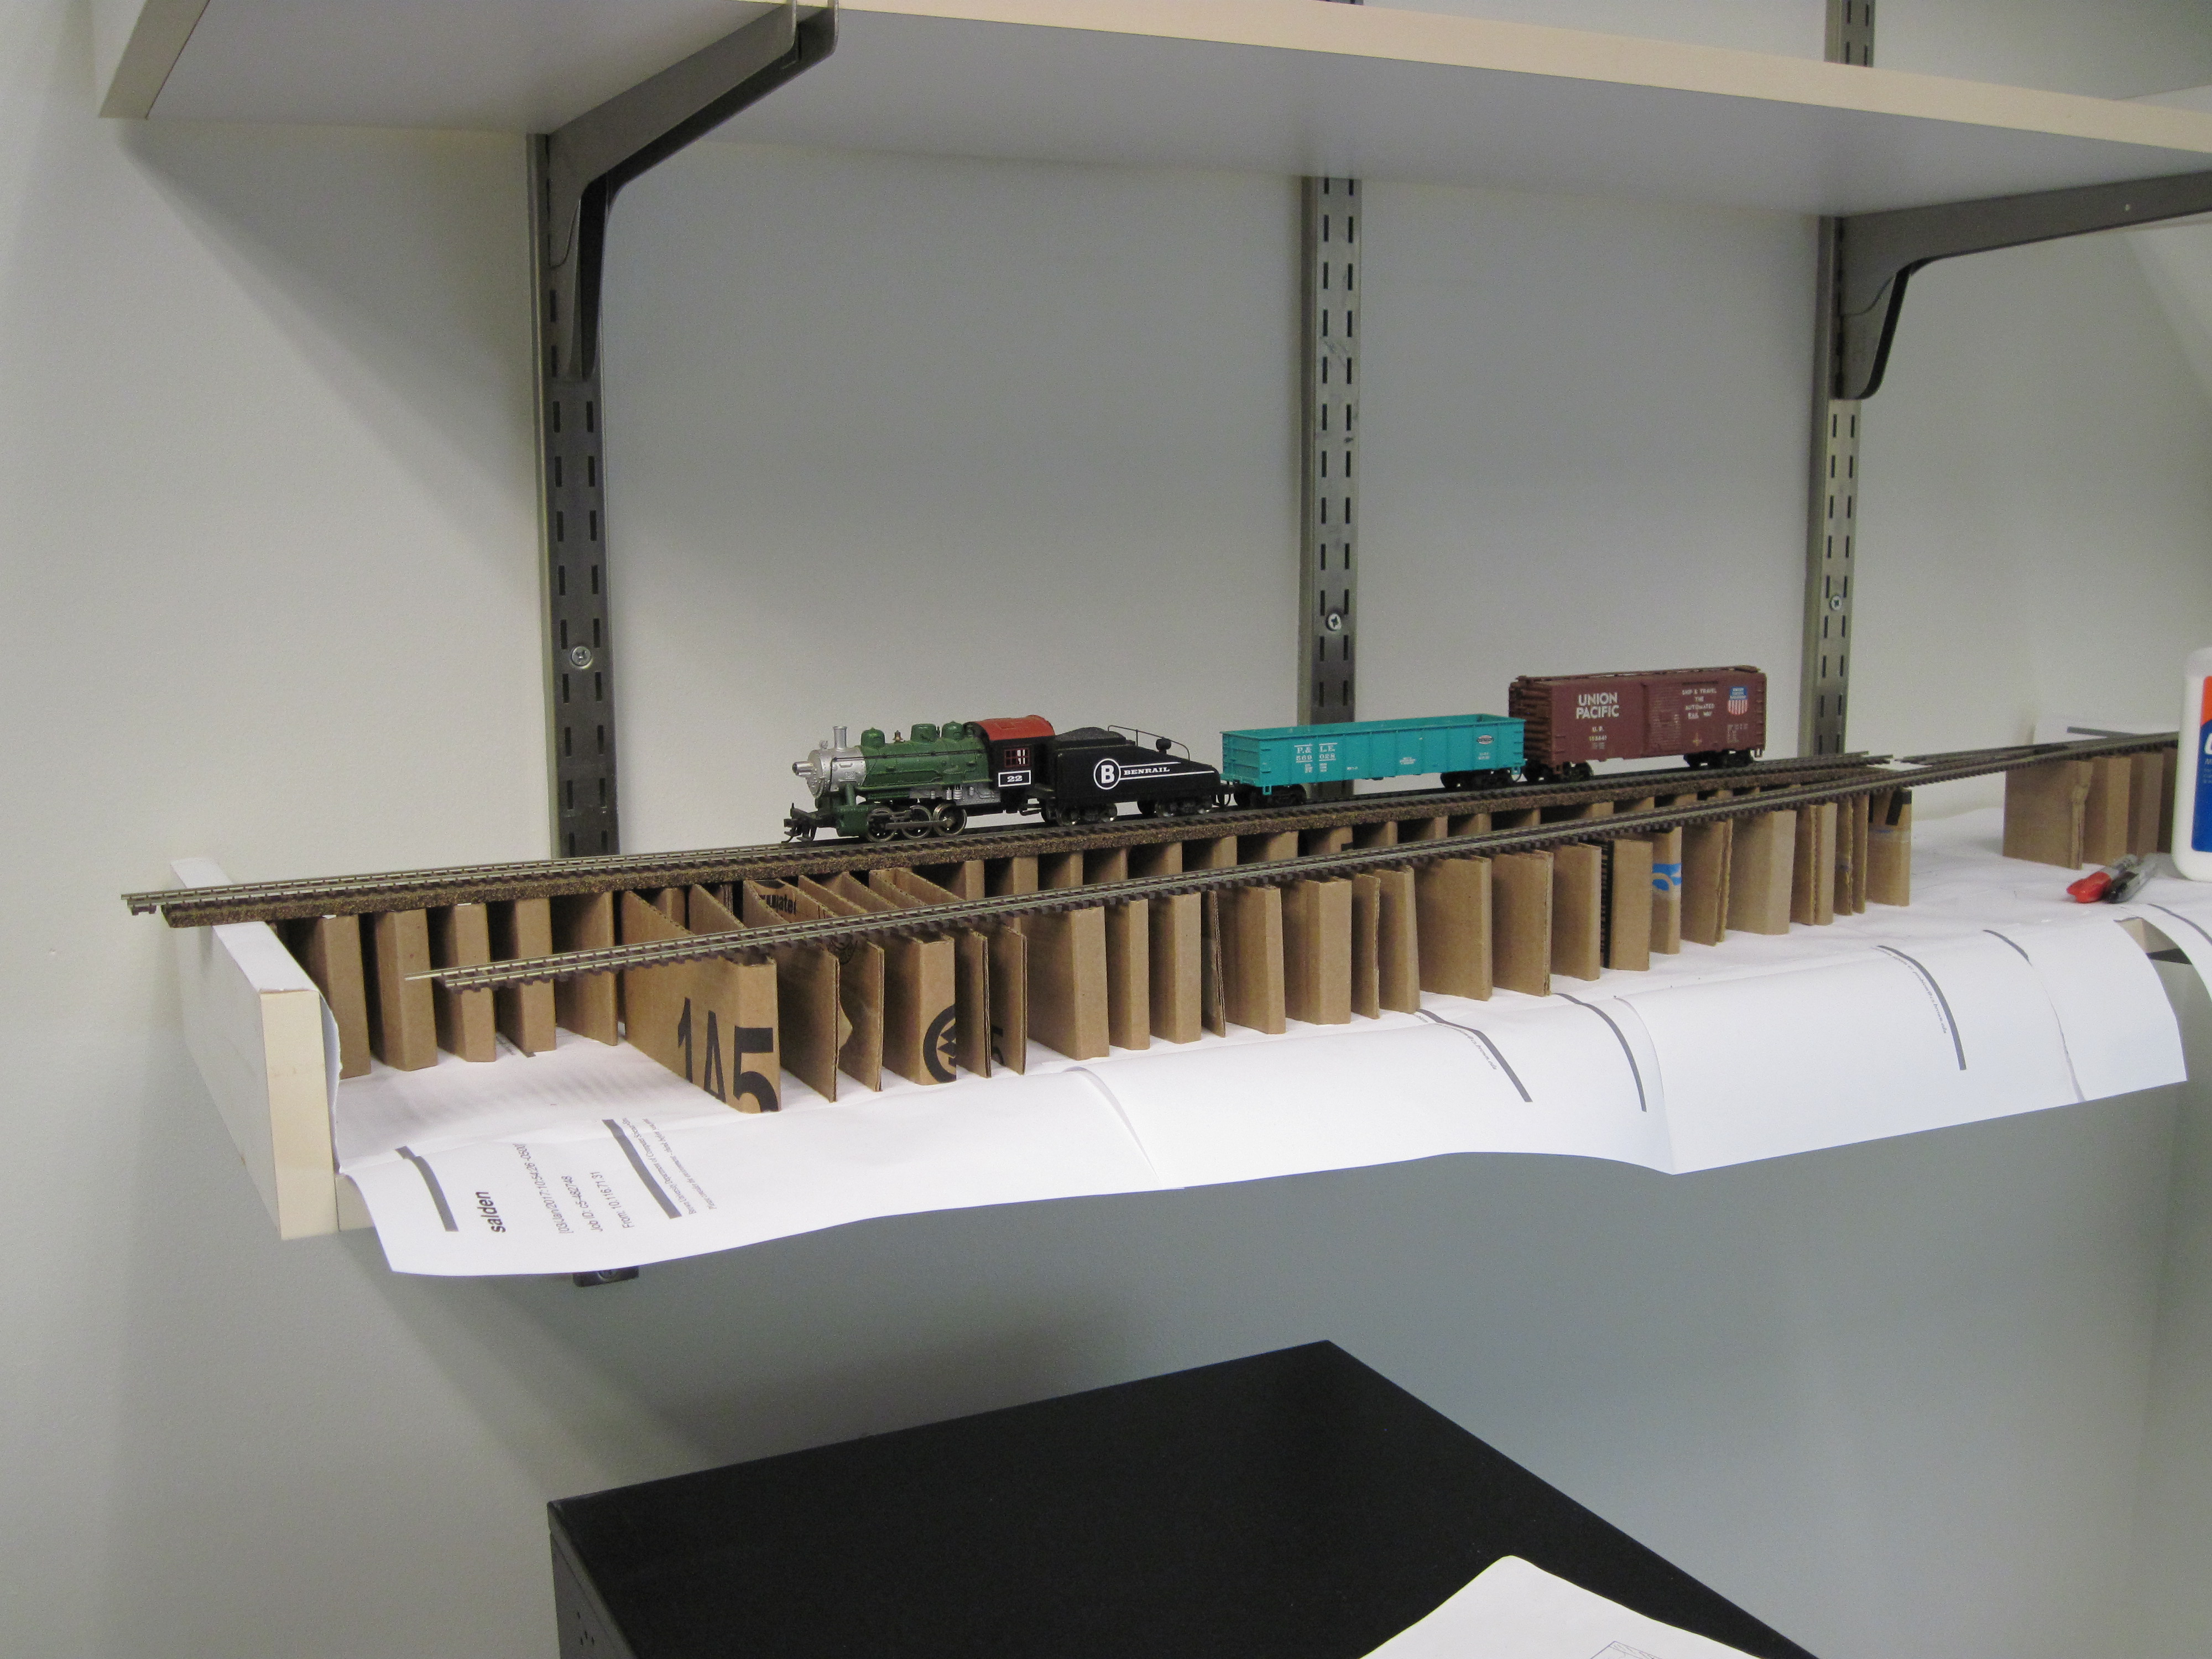
The locomotive and freight cars are from the first train set I ever had. That locomotive - a Mantua engine formerly decorated as Great Northern Railway no. 407, now Benrail no. 22 - no longer runs and hasn't for years, hence my choice of it for static display purposes.
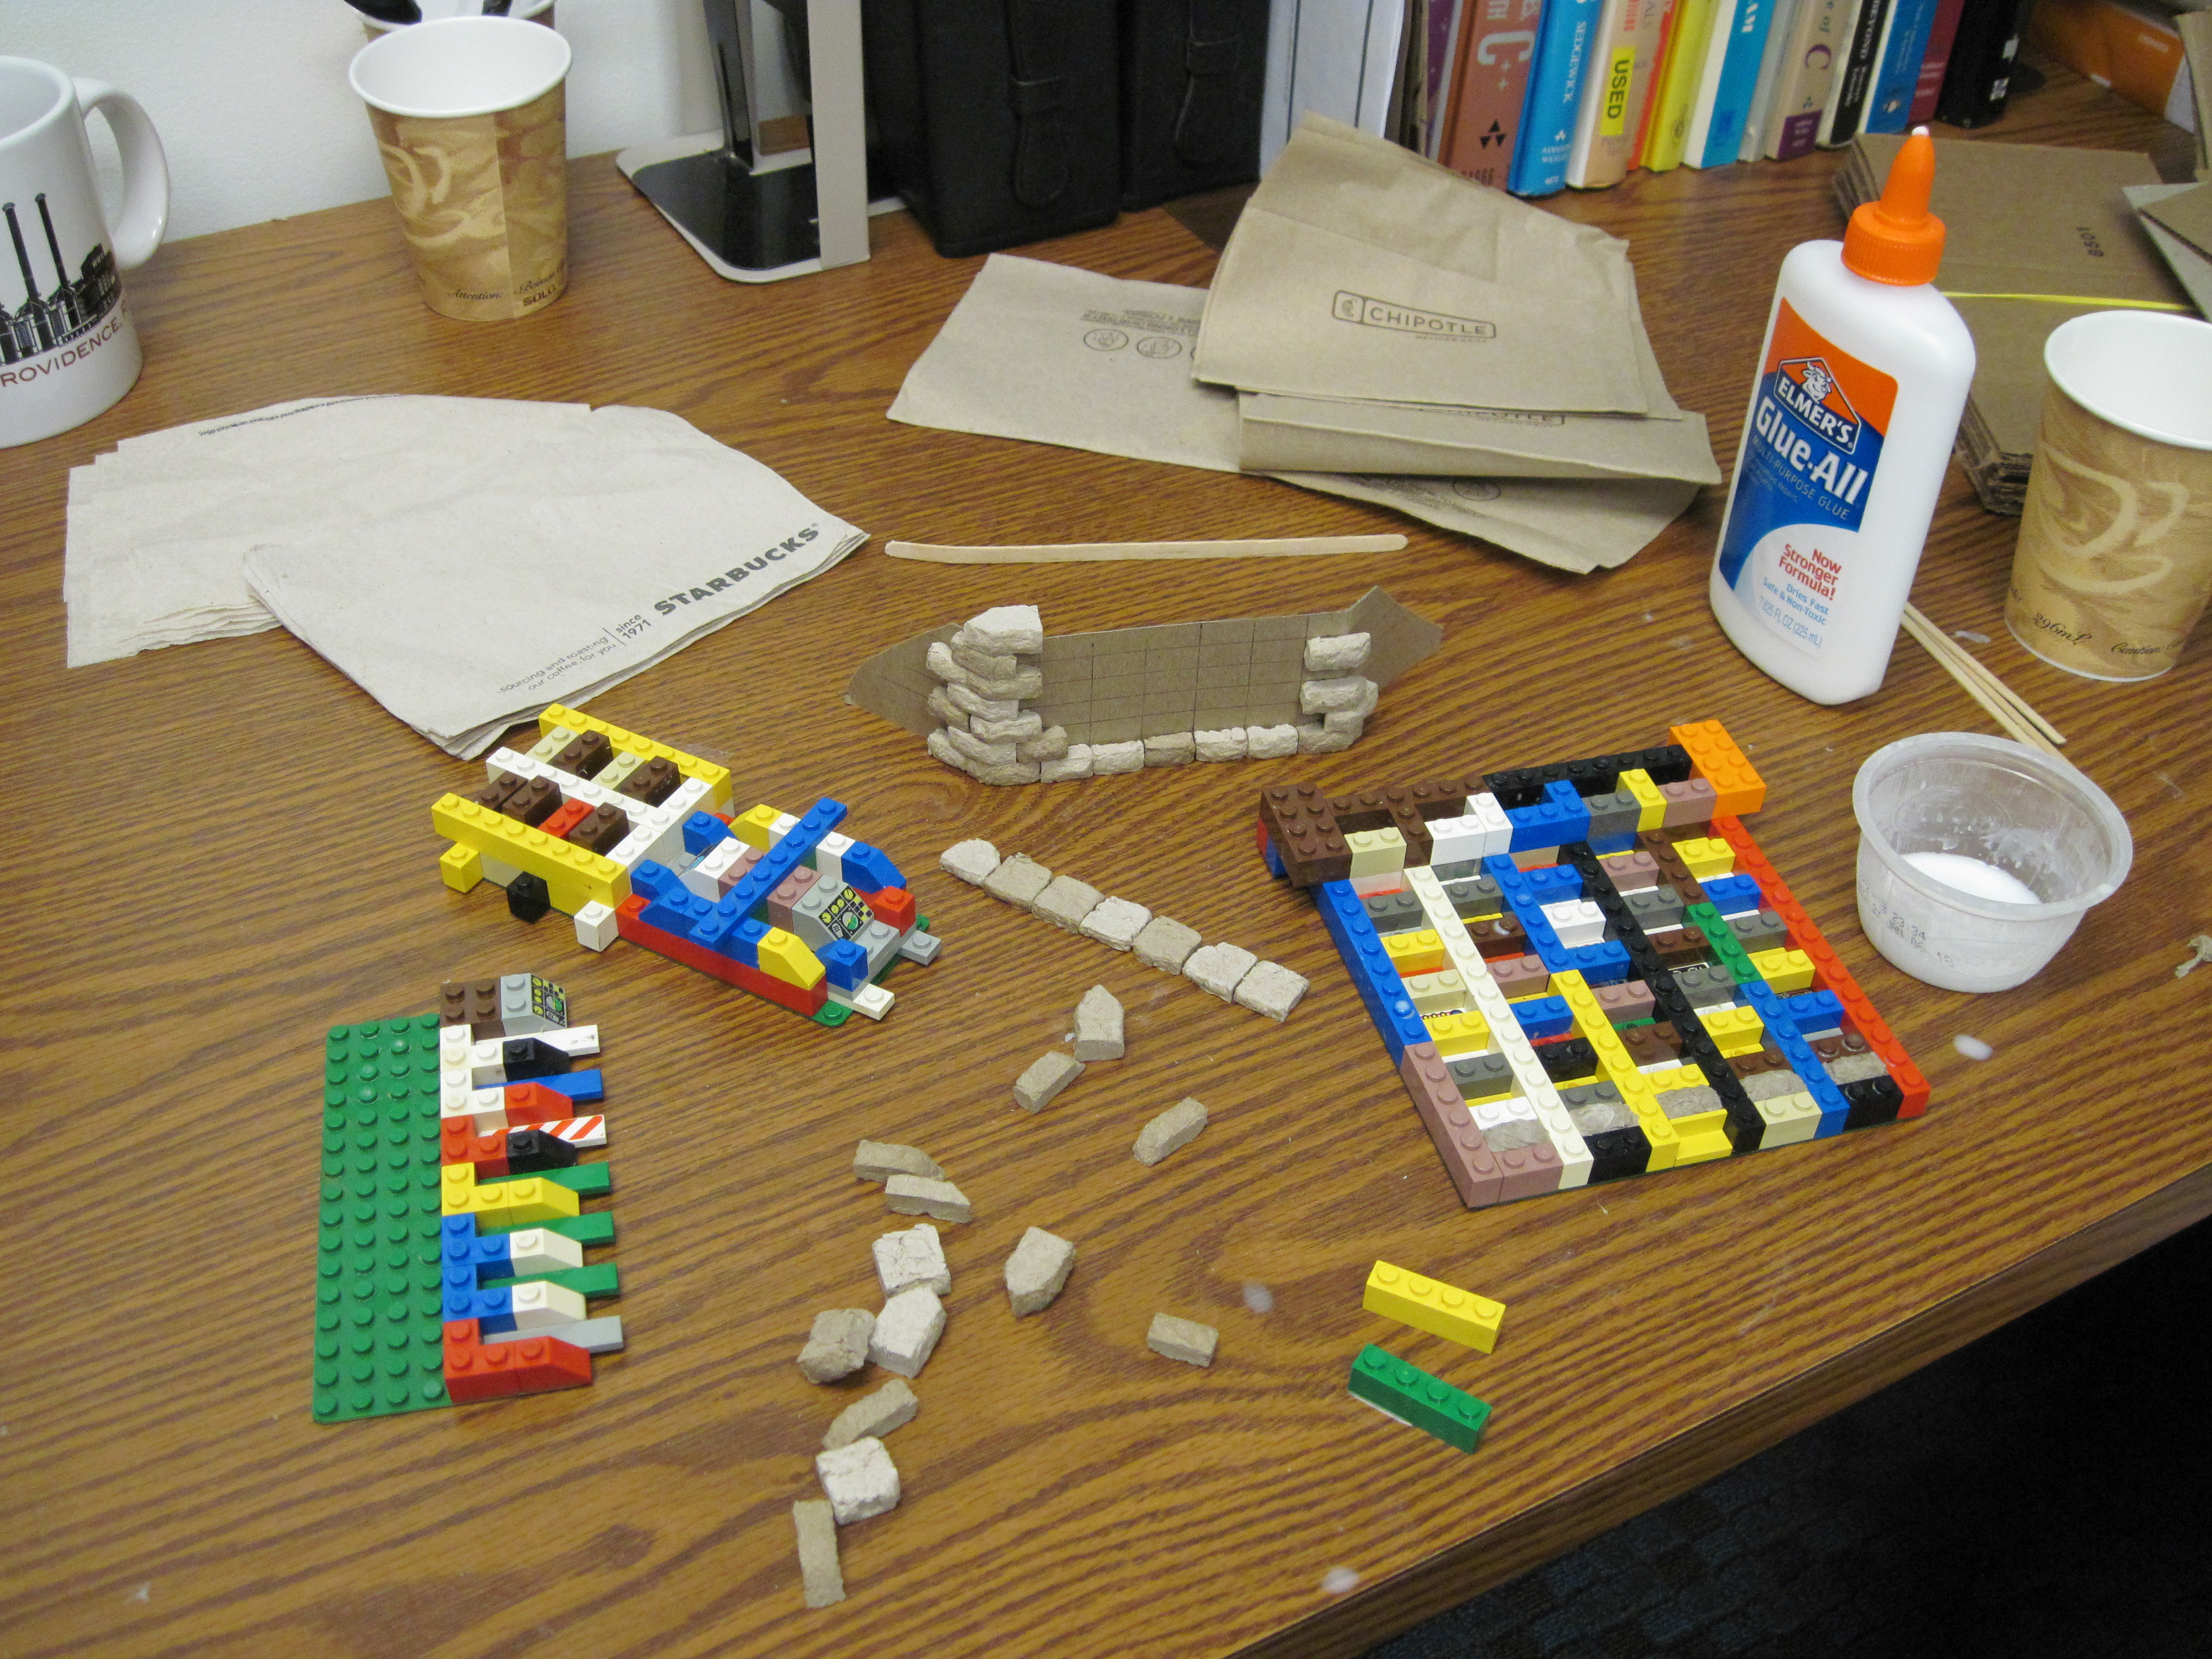
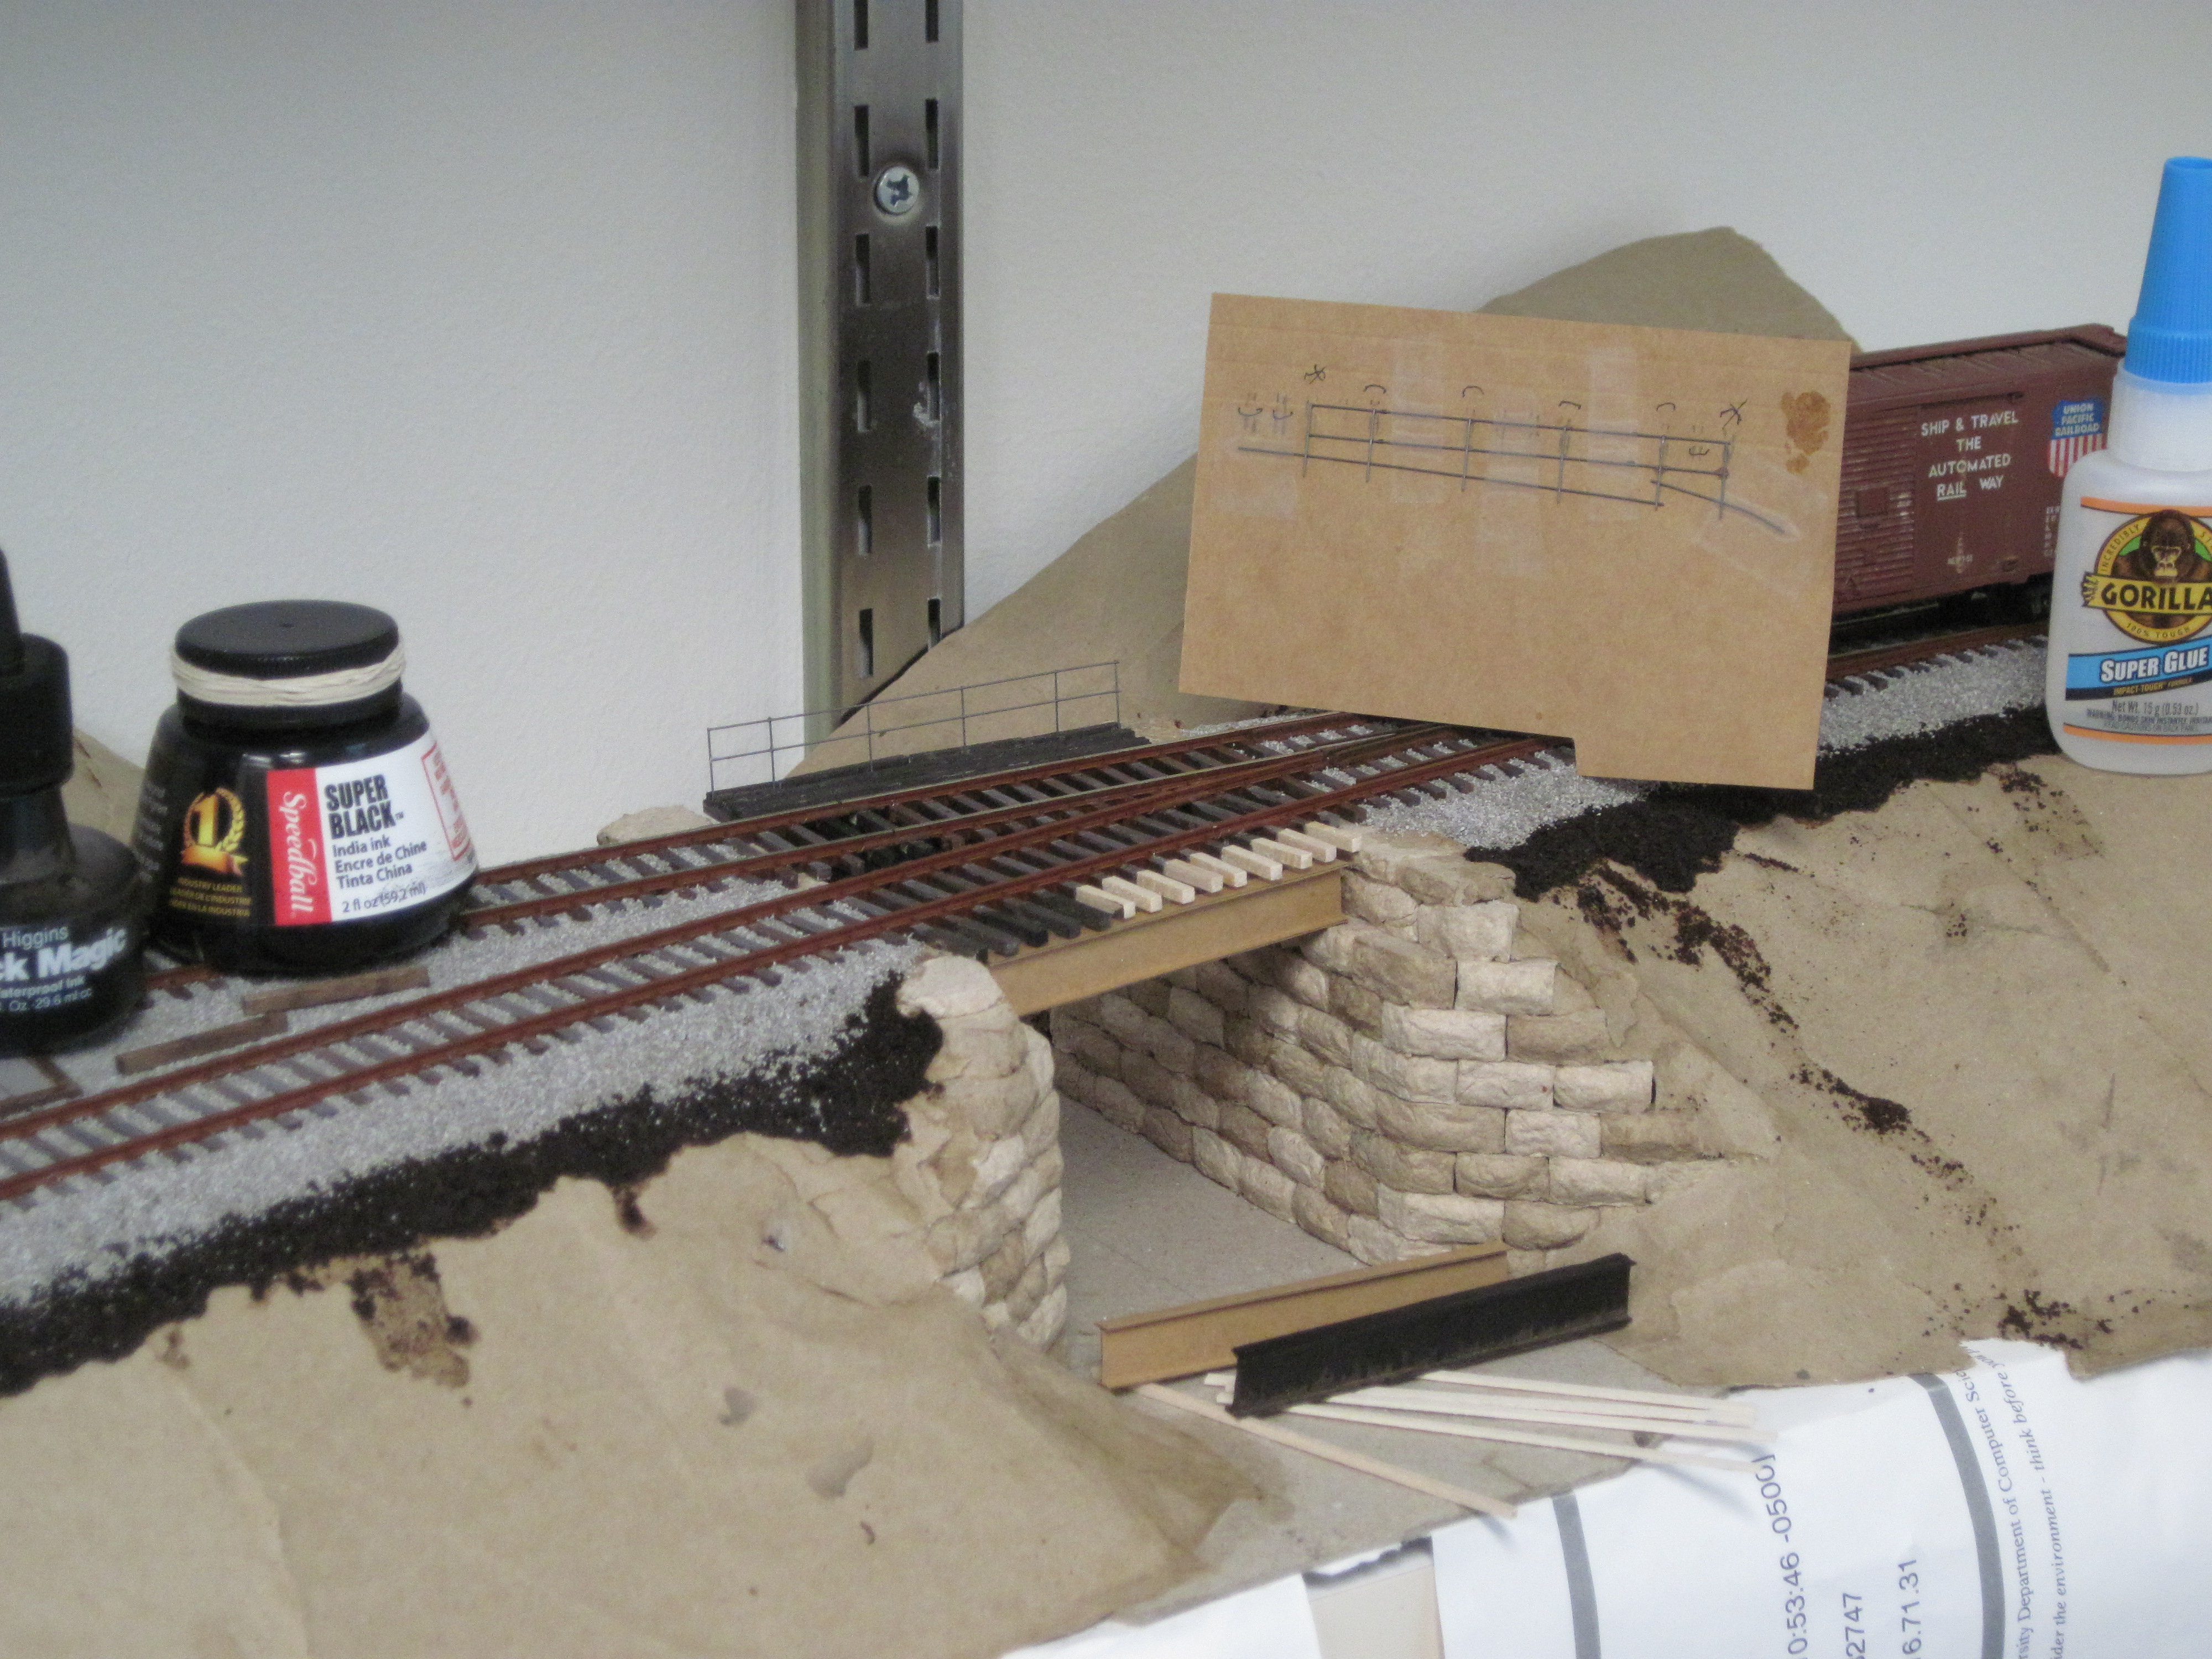
I needed a couple of bridge abutments for where the tracks go over the brook at the right. You can buy pre-cast bridge abutments in a variety of designs from hobby stores, but I wanted to see how little money I could get away with spending on this project, so I opted to make the retaining walls myself piece by piece. I found some years ago that soaking wads of toilet paper in water and setting them in rectangular casts makes realistic cut-stone shapes. Legos work nicely for this. One 1x2 Lego brick has a 5/16 in. by 5/8 in. footprint, or slightly bigger than 2 ft. by 4 ft. in HO scale. This time I used brown paper napkins instead of toilet paper, and watery glue for extra durability. Different combinations of Lego pieces gave me the right shapes for where the wall makes a 135-degree angle.
Here's one of the completed abutments in place. I was originally going to paint it, but I discovered that if you use slightly differently-colored brown paper napkins (Starbucks' napkins are lighter than Chipotle's) it looks pretty believable without further coloring.
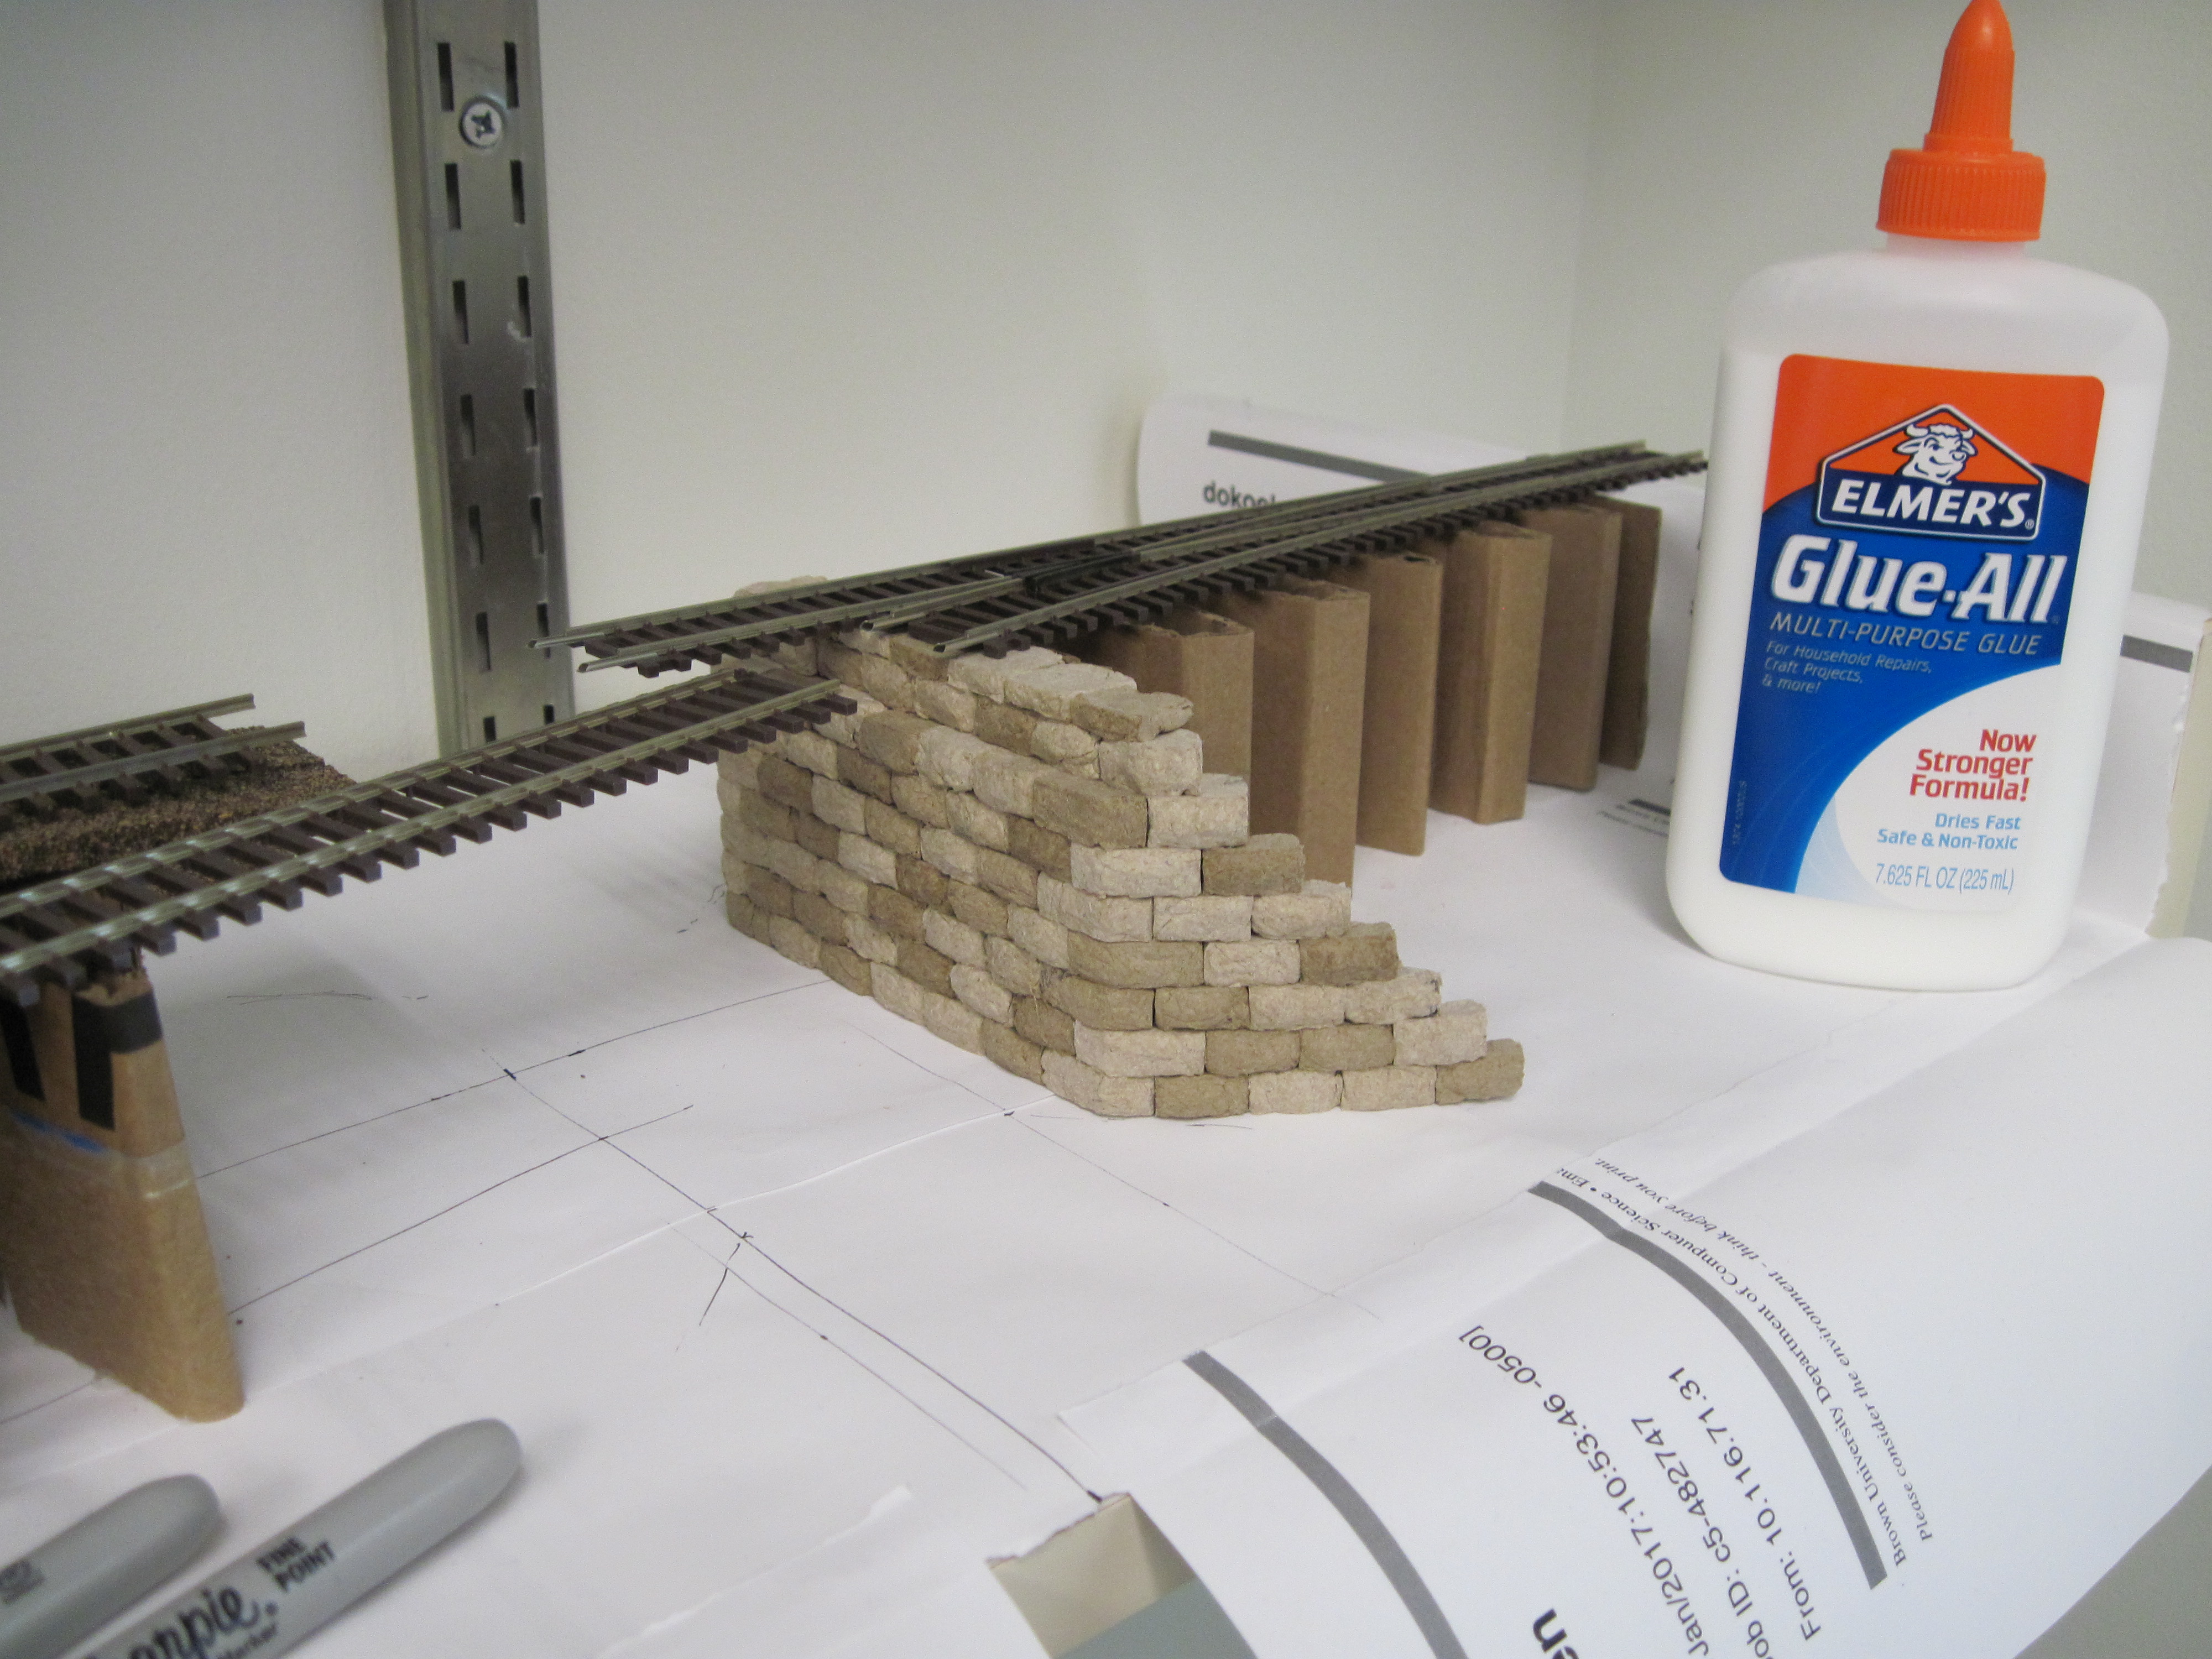
Prof. David Laidlaw points out that the face of the wall should really have a slight slant to it. Very true, but I figured getting that just right was more trouble than it was worth for this project.
Here's another shot with both bridge abutments in place and more of the landscape filled in. Once there's enough cardboard substructure, I cover it with brown paper bag paper, which comes believably close to the color of dry soil without further adjustment.
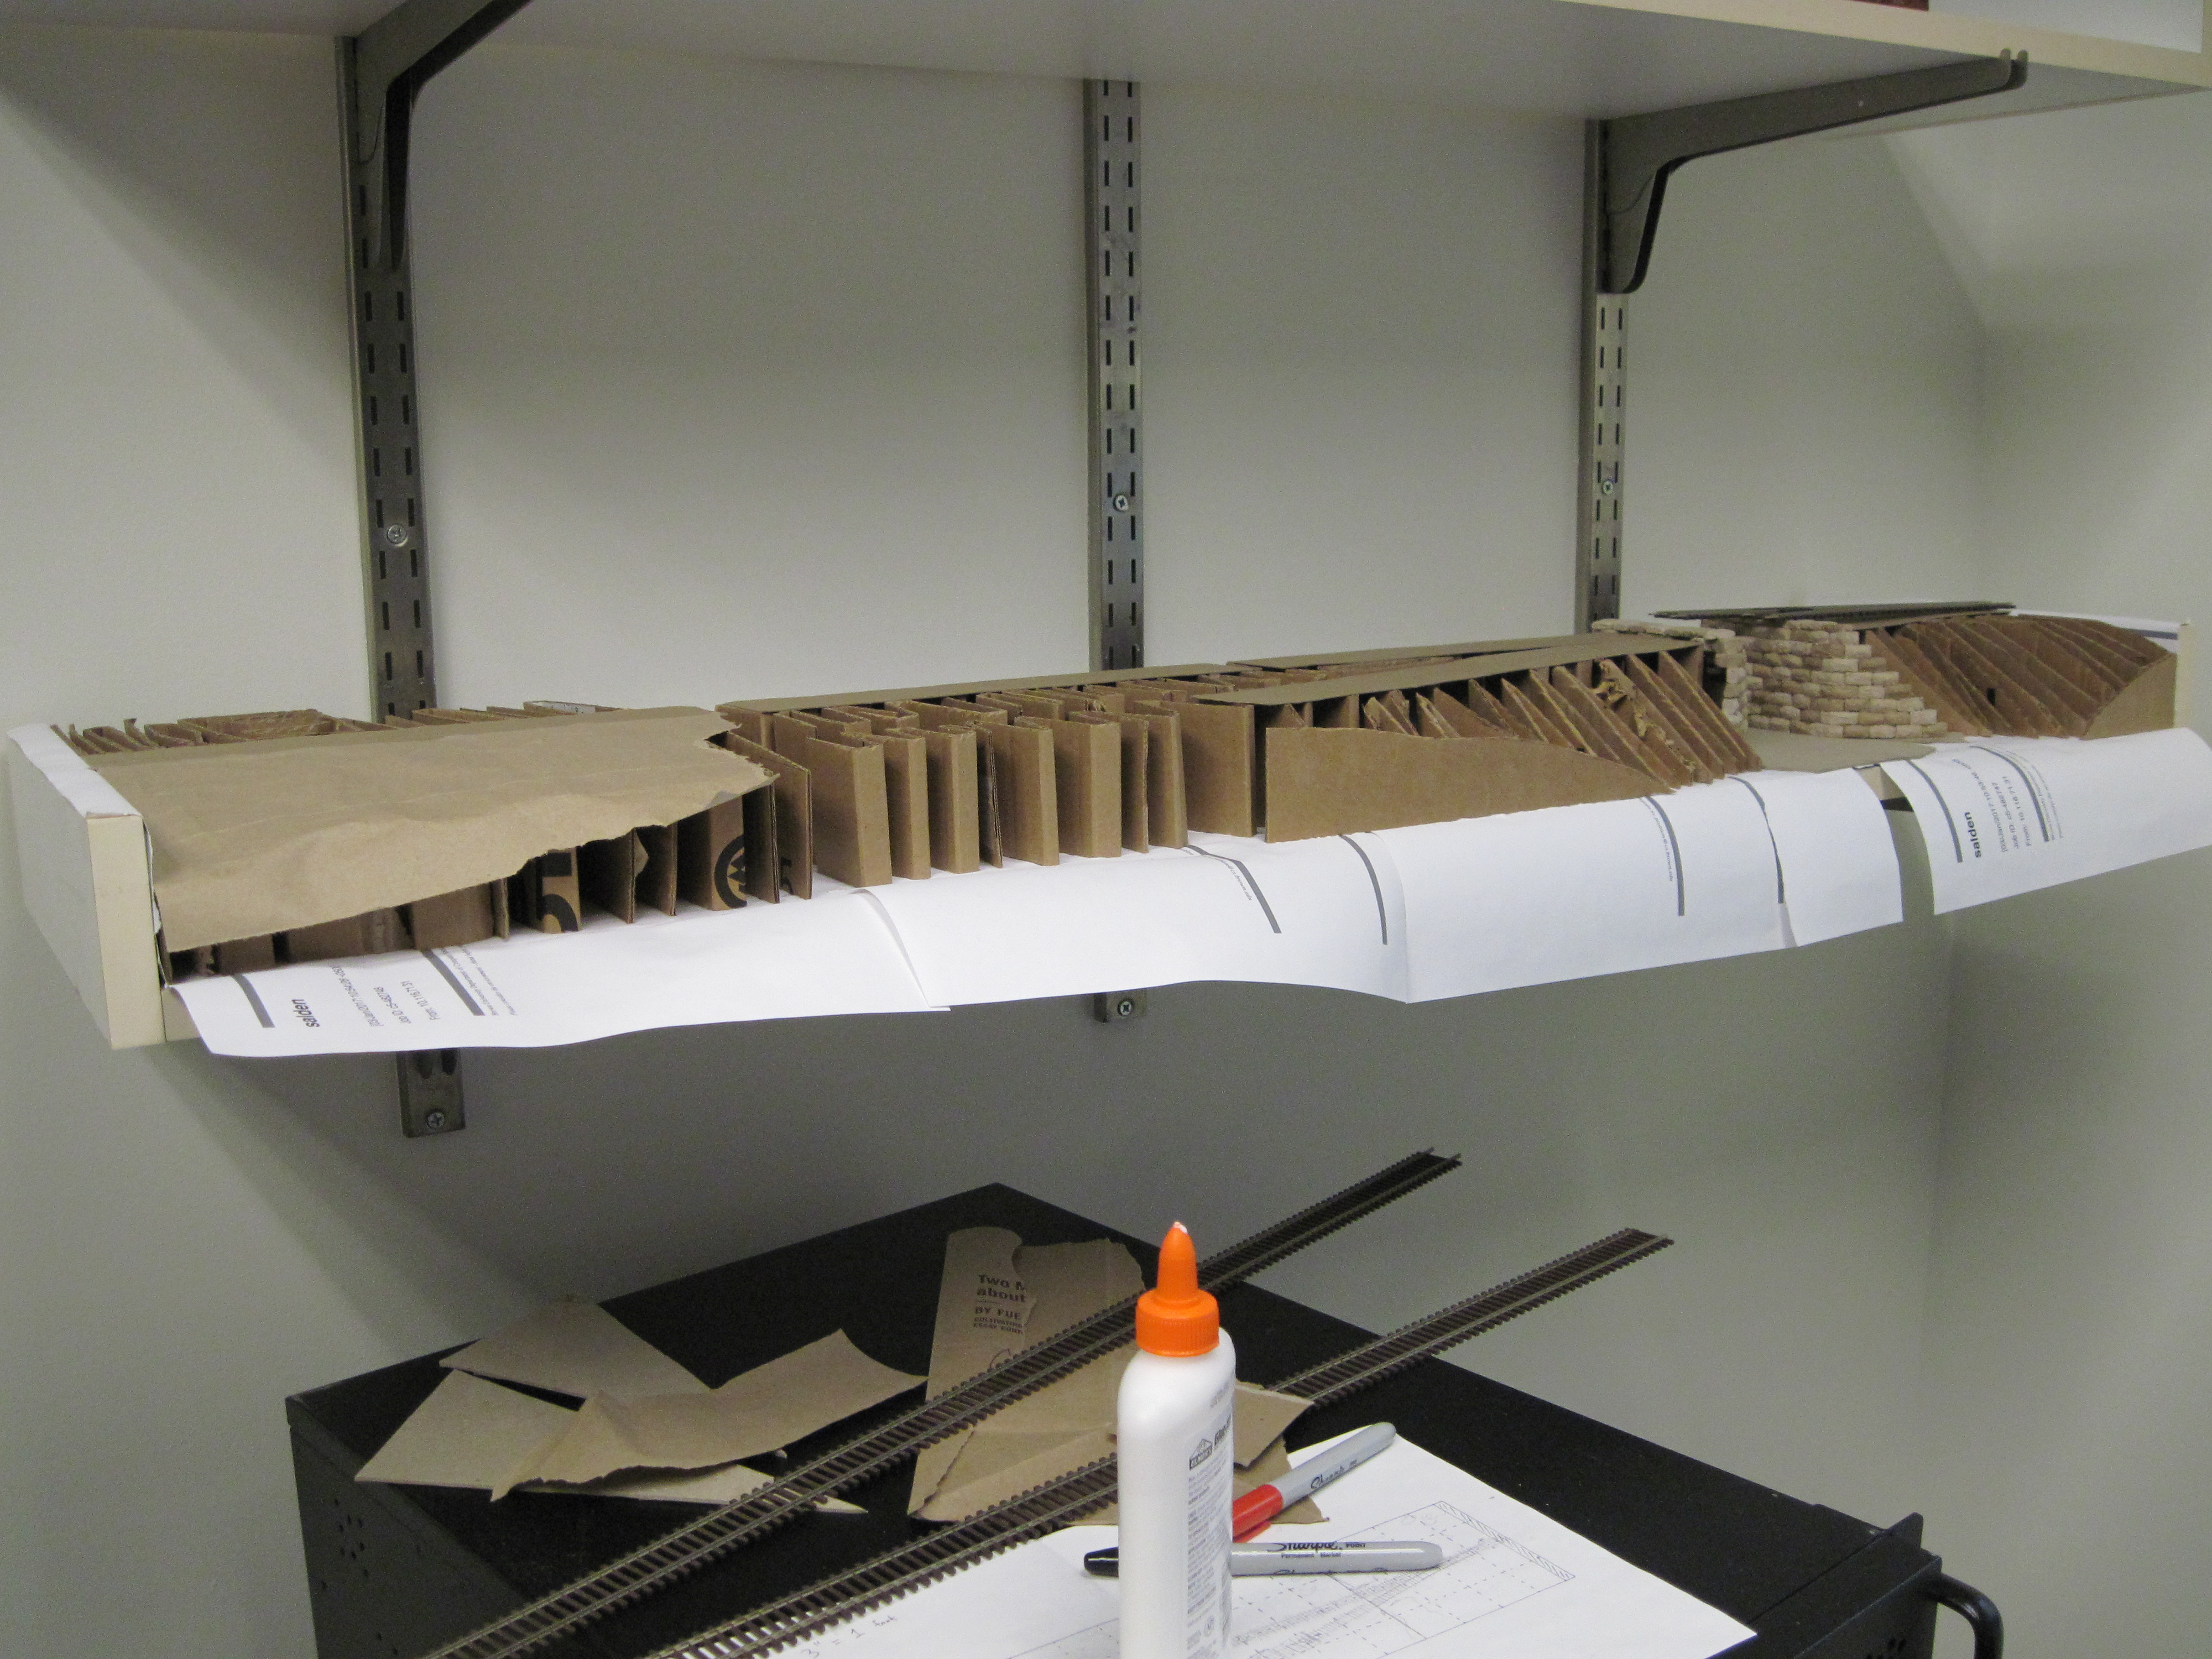
And here's the basic terrain all filled in. I reached this stage almost exactly one year after I embarked on this project. A dedicated hobbyist could probably have reached this stage in a day (not counting the time spent making the bridge abutments).
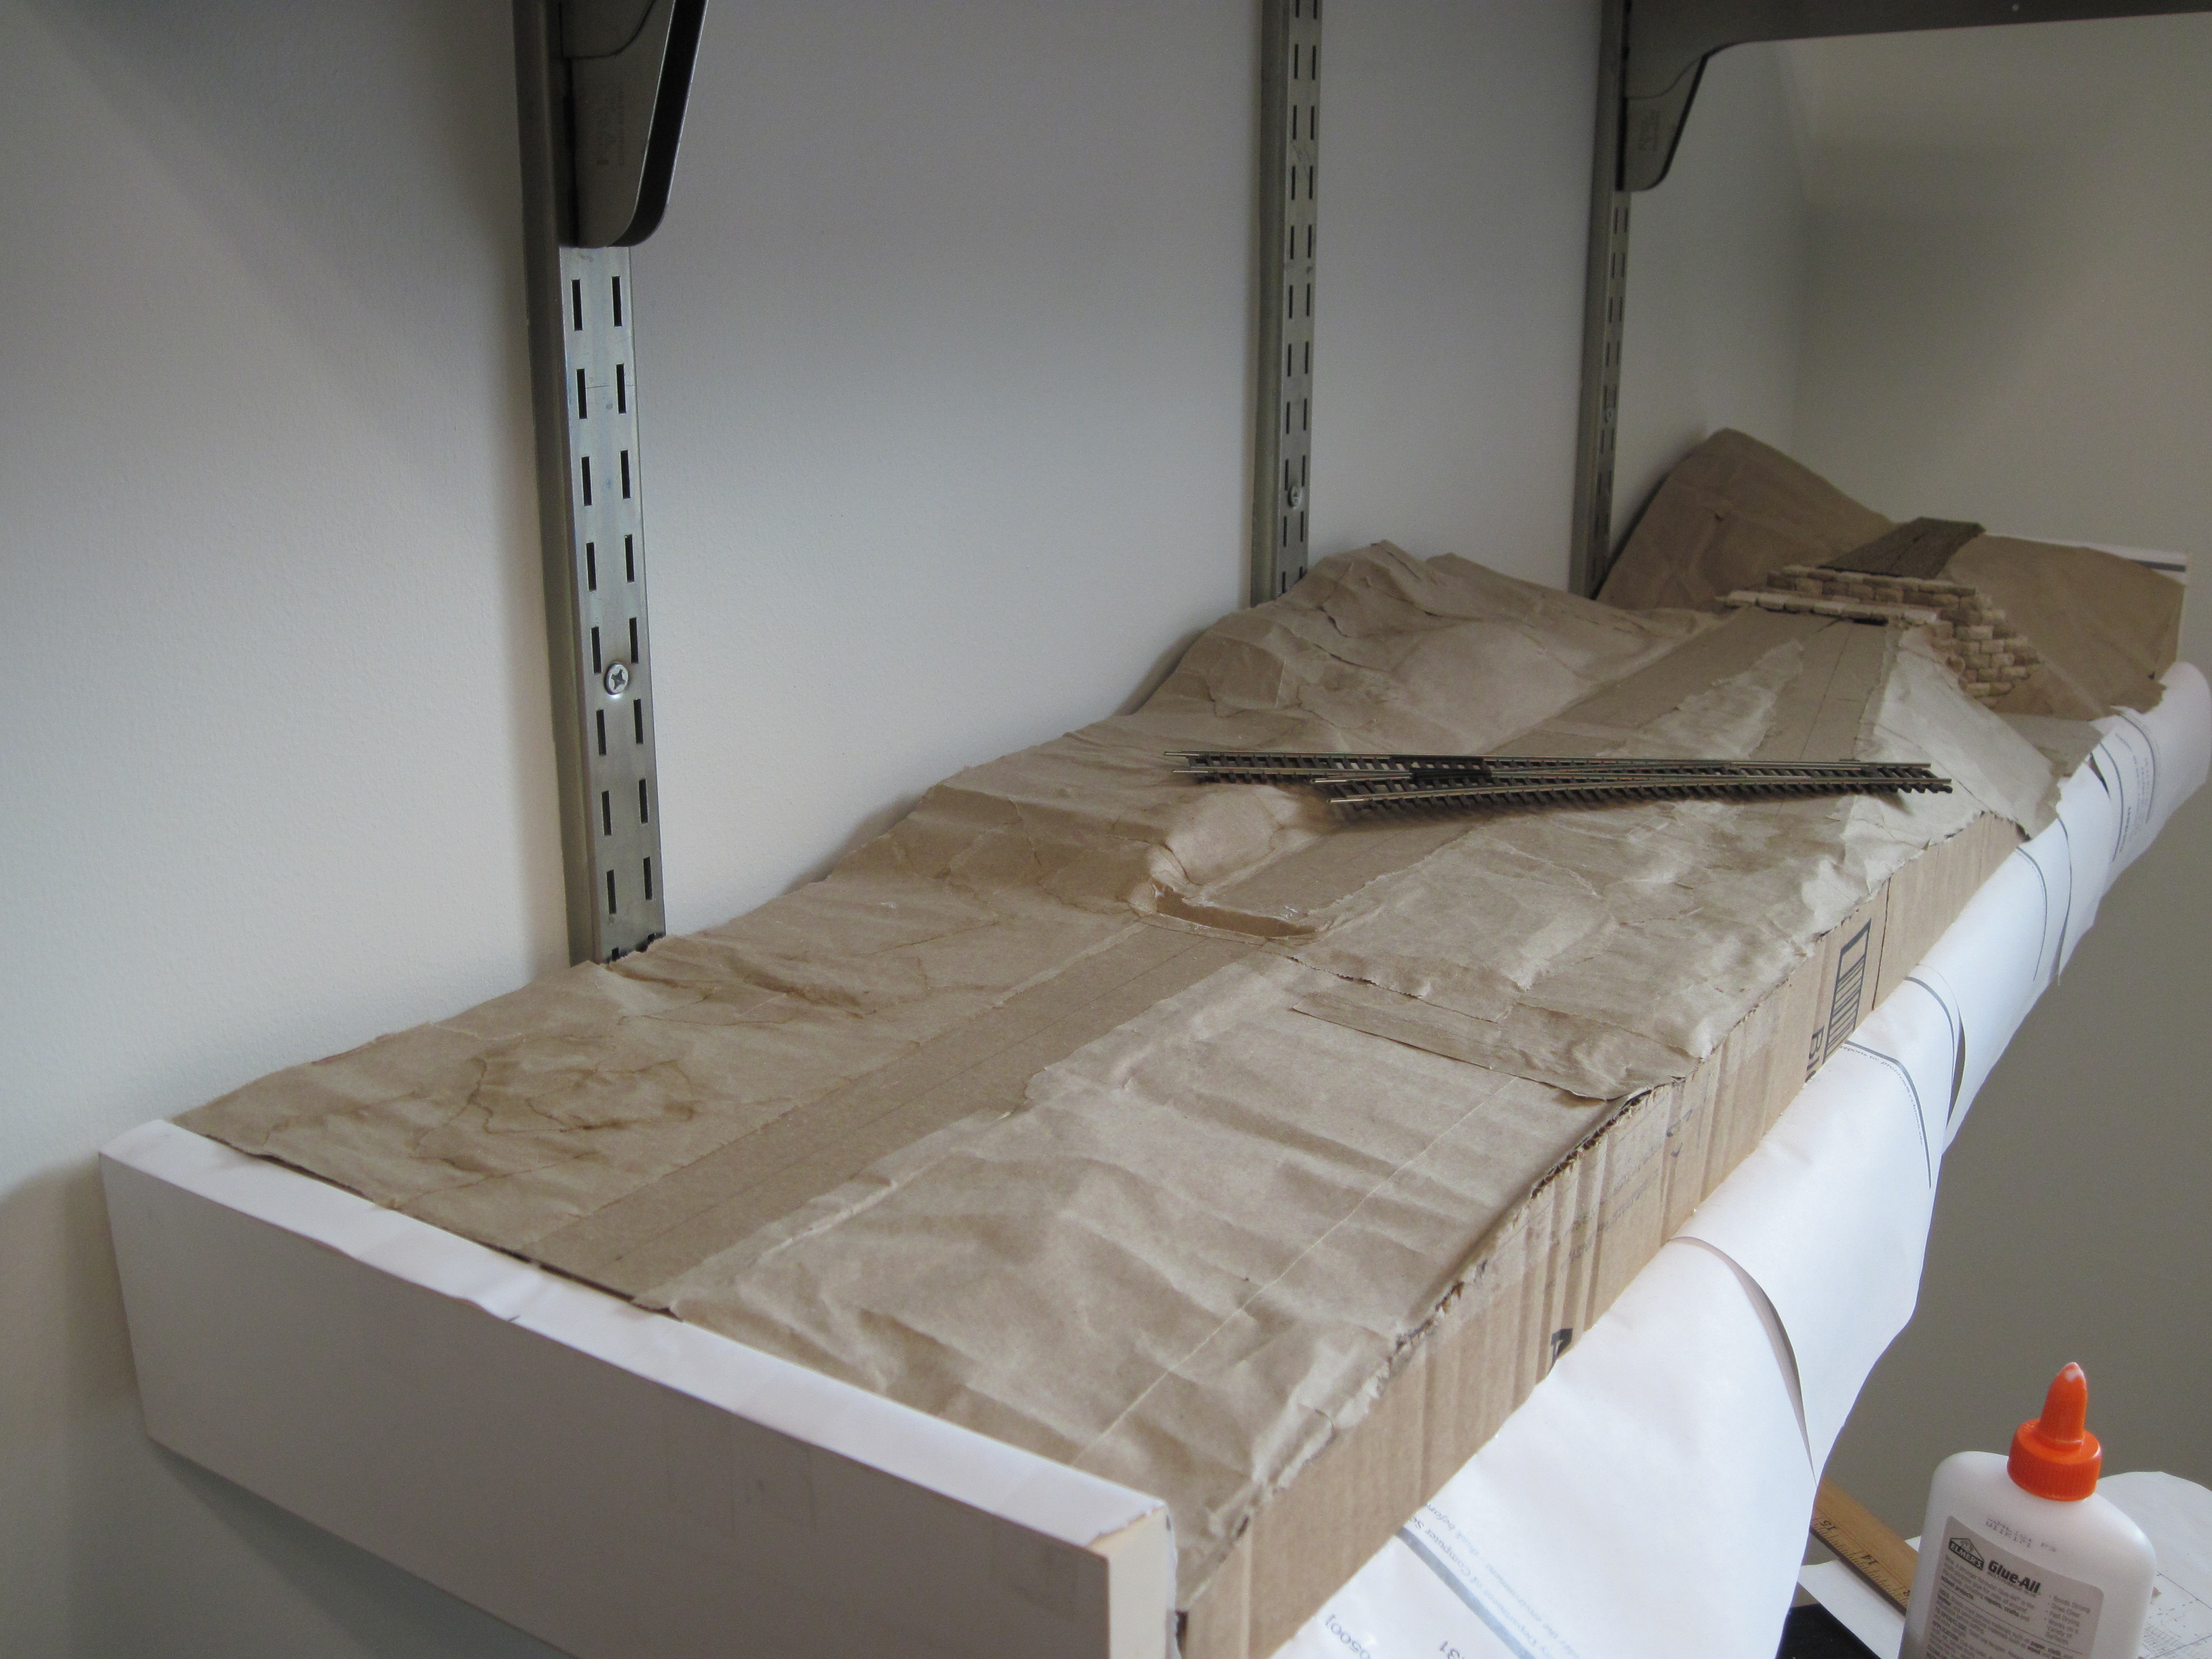
In case you're wondering, the trench space across the main line near the middle of the picture is so that I can run wires to light the station, crossing signals etc.
The roadbed, which elevates the tracks for purposes of drainage, can be considered part of the sub-landscape. There are various ways of achieving the shape of the roadbed without having to build the whole thing up using miniature gravel. The most popular way is to use cork strips with bevelled edges, commercially available from various companies. (If you're building an operational train layout, the cork also serves to dampen the noise from running trains.) This was another instance where I just happened to have old supplies lying around. Without them, I could probably have built up the roadbed with carefully-aligned pieces of cardboard.

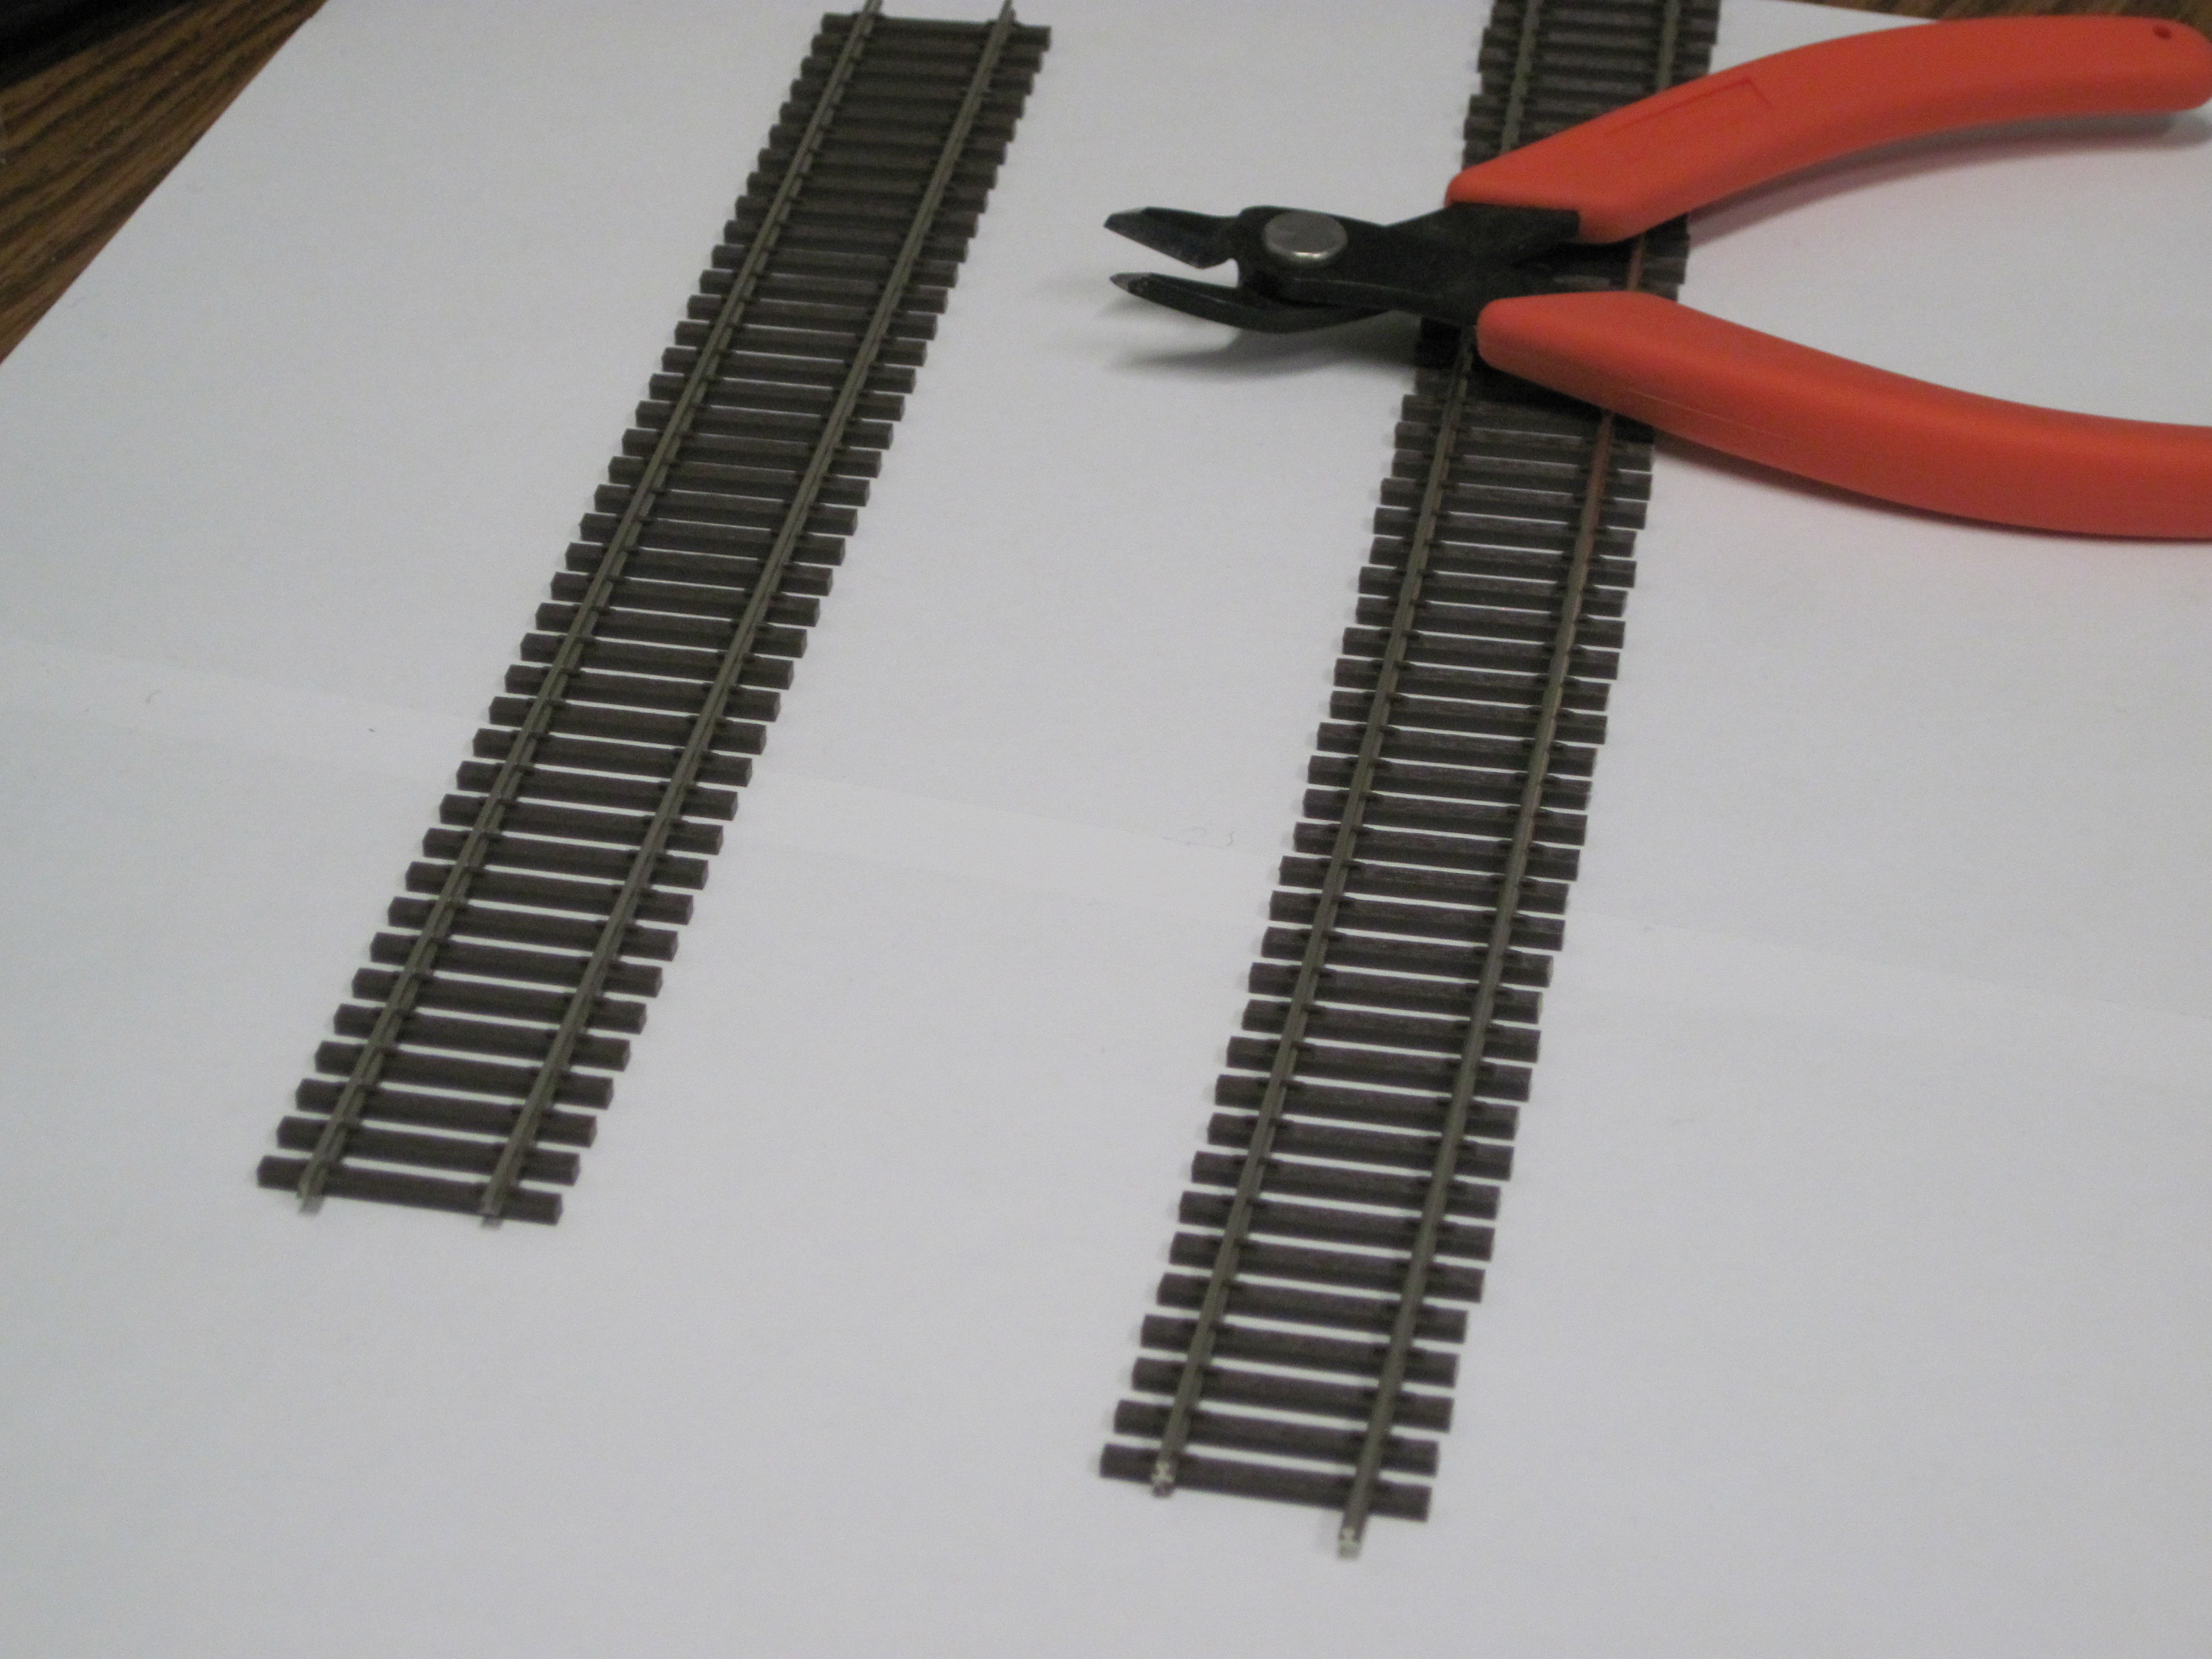
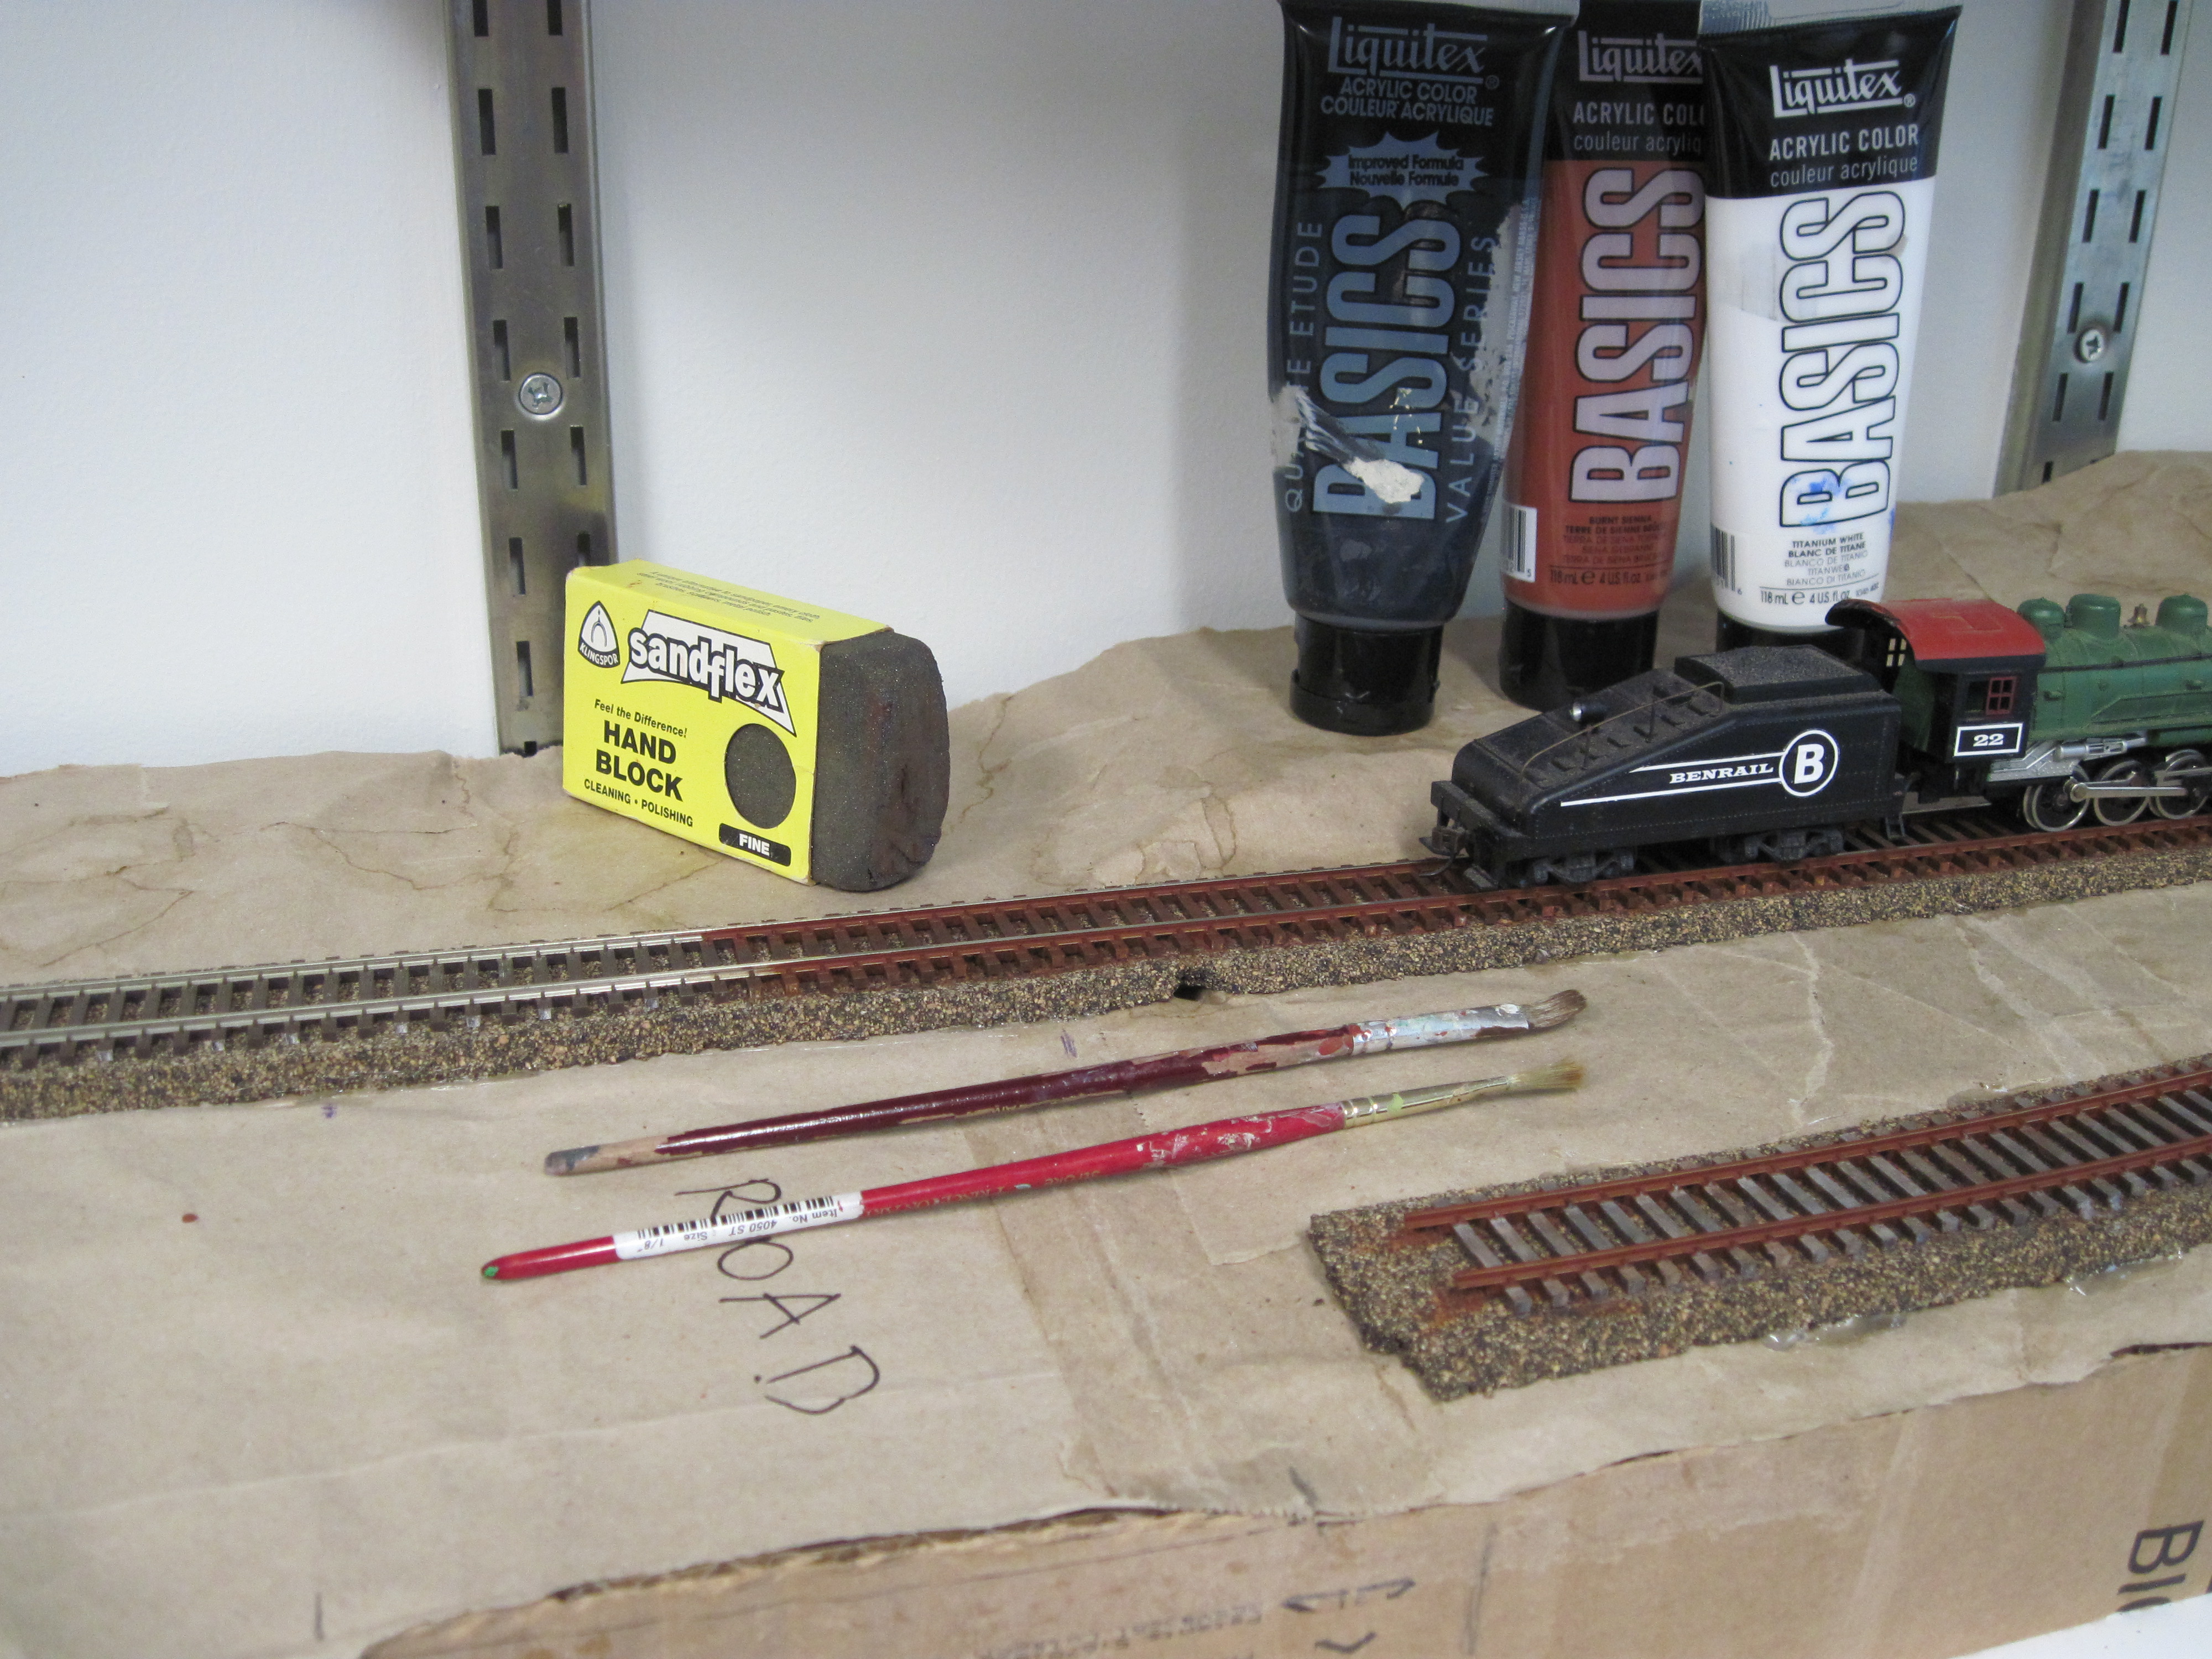
If you look at photos of real-life railroad tracks, especially track that's been laid more than two or three decades ago, you'll probably see that railroad ties aren't laid perfectly evenly - the ends of the ties don't quite line up. One trick you can use to make commercially-available model train track look more realistic is to nip off the ends of individual ties here and there. The photo below shows the difference between untouched track and track thus doctored. (Master model railroader George Sellios uses this trick to striking effect on his own mammoth Franklin and South Manchester railroad layout.)
Because the ties are plastic, you need something more potent than white glue to affix the tracks to the roadbed, and you definitely want something non-water-soluble, because the process for adding gravel around the tracks involves soaking the entire area with watery white glue. I used a hot glue gun, but I wouldn't recommend it - you have very little time to work with that kind of glue before it solidifies. On my first try, I accidentally glued the switch into a halfway position. I had to pry it loose (which tore the cork up in a couple places) and start again.
At this point it's necessary to do some painting. If you look at real-life railroad tracks, you'll see that rails aren't gray and ties aren't brown - in fact, it's often exactly the reverse, what with rust and sunbleaching. Painting everything the same flat brown is a distinct improvement, but it's even more fun to add varying shades of lighter brown and gray to highlight the individual ties. Here you can see the result of different stages of painting. I don't have any magic paint formulas here - just take pictures of real-life tracks or do a google image search and decide what shades you're aiming for. No need for fancy hobbyist paints here; I've always gotten pretty good results with cheap artists' acrylics, watered down and applied in multiple coats. (The best results are gotten with an airbrush or a spray can, but this office doesn't have sufficient ventilation to allow for that.) One final note: the tops of rails remain shiny on well-used tracks, so for contrast between the main line and the siding I used an abrasive pad only on the main line after painting. (If you're building an operational layout, you have to clean the tops of the rails everywhere, for electrical conductivity.)
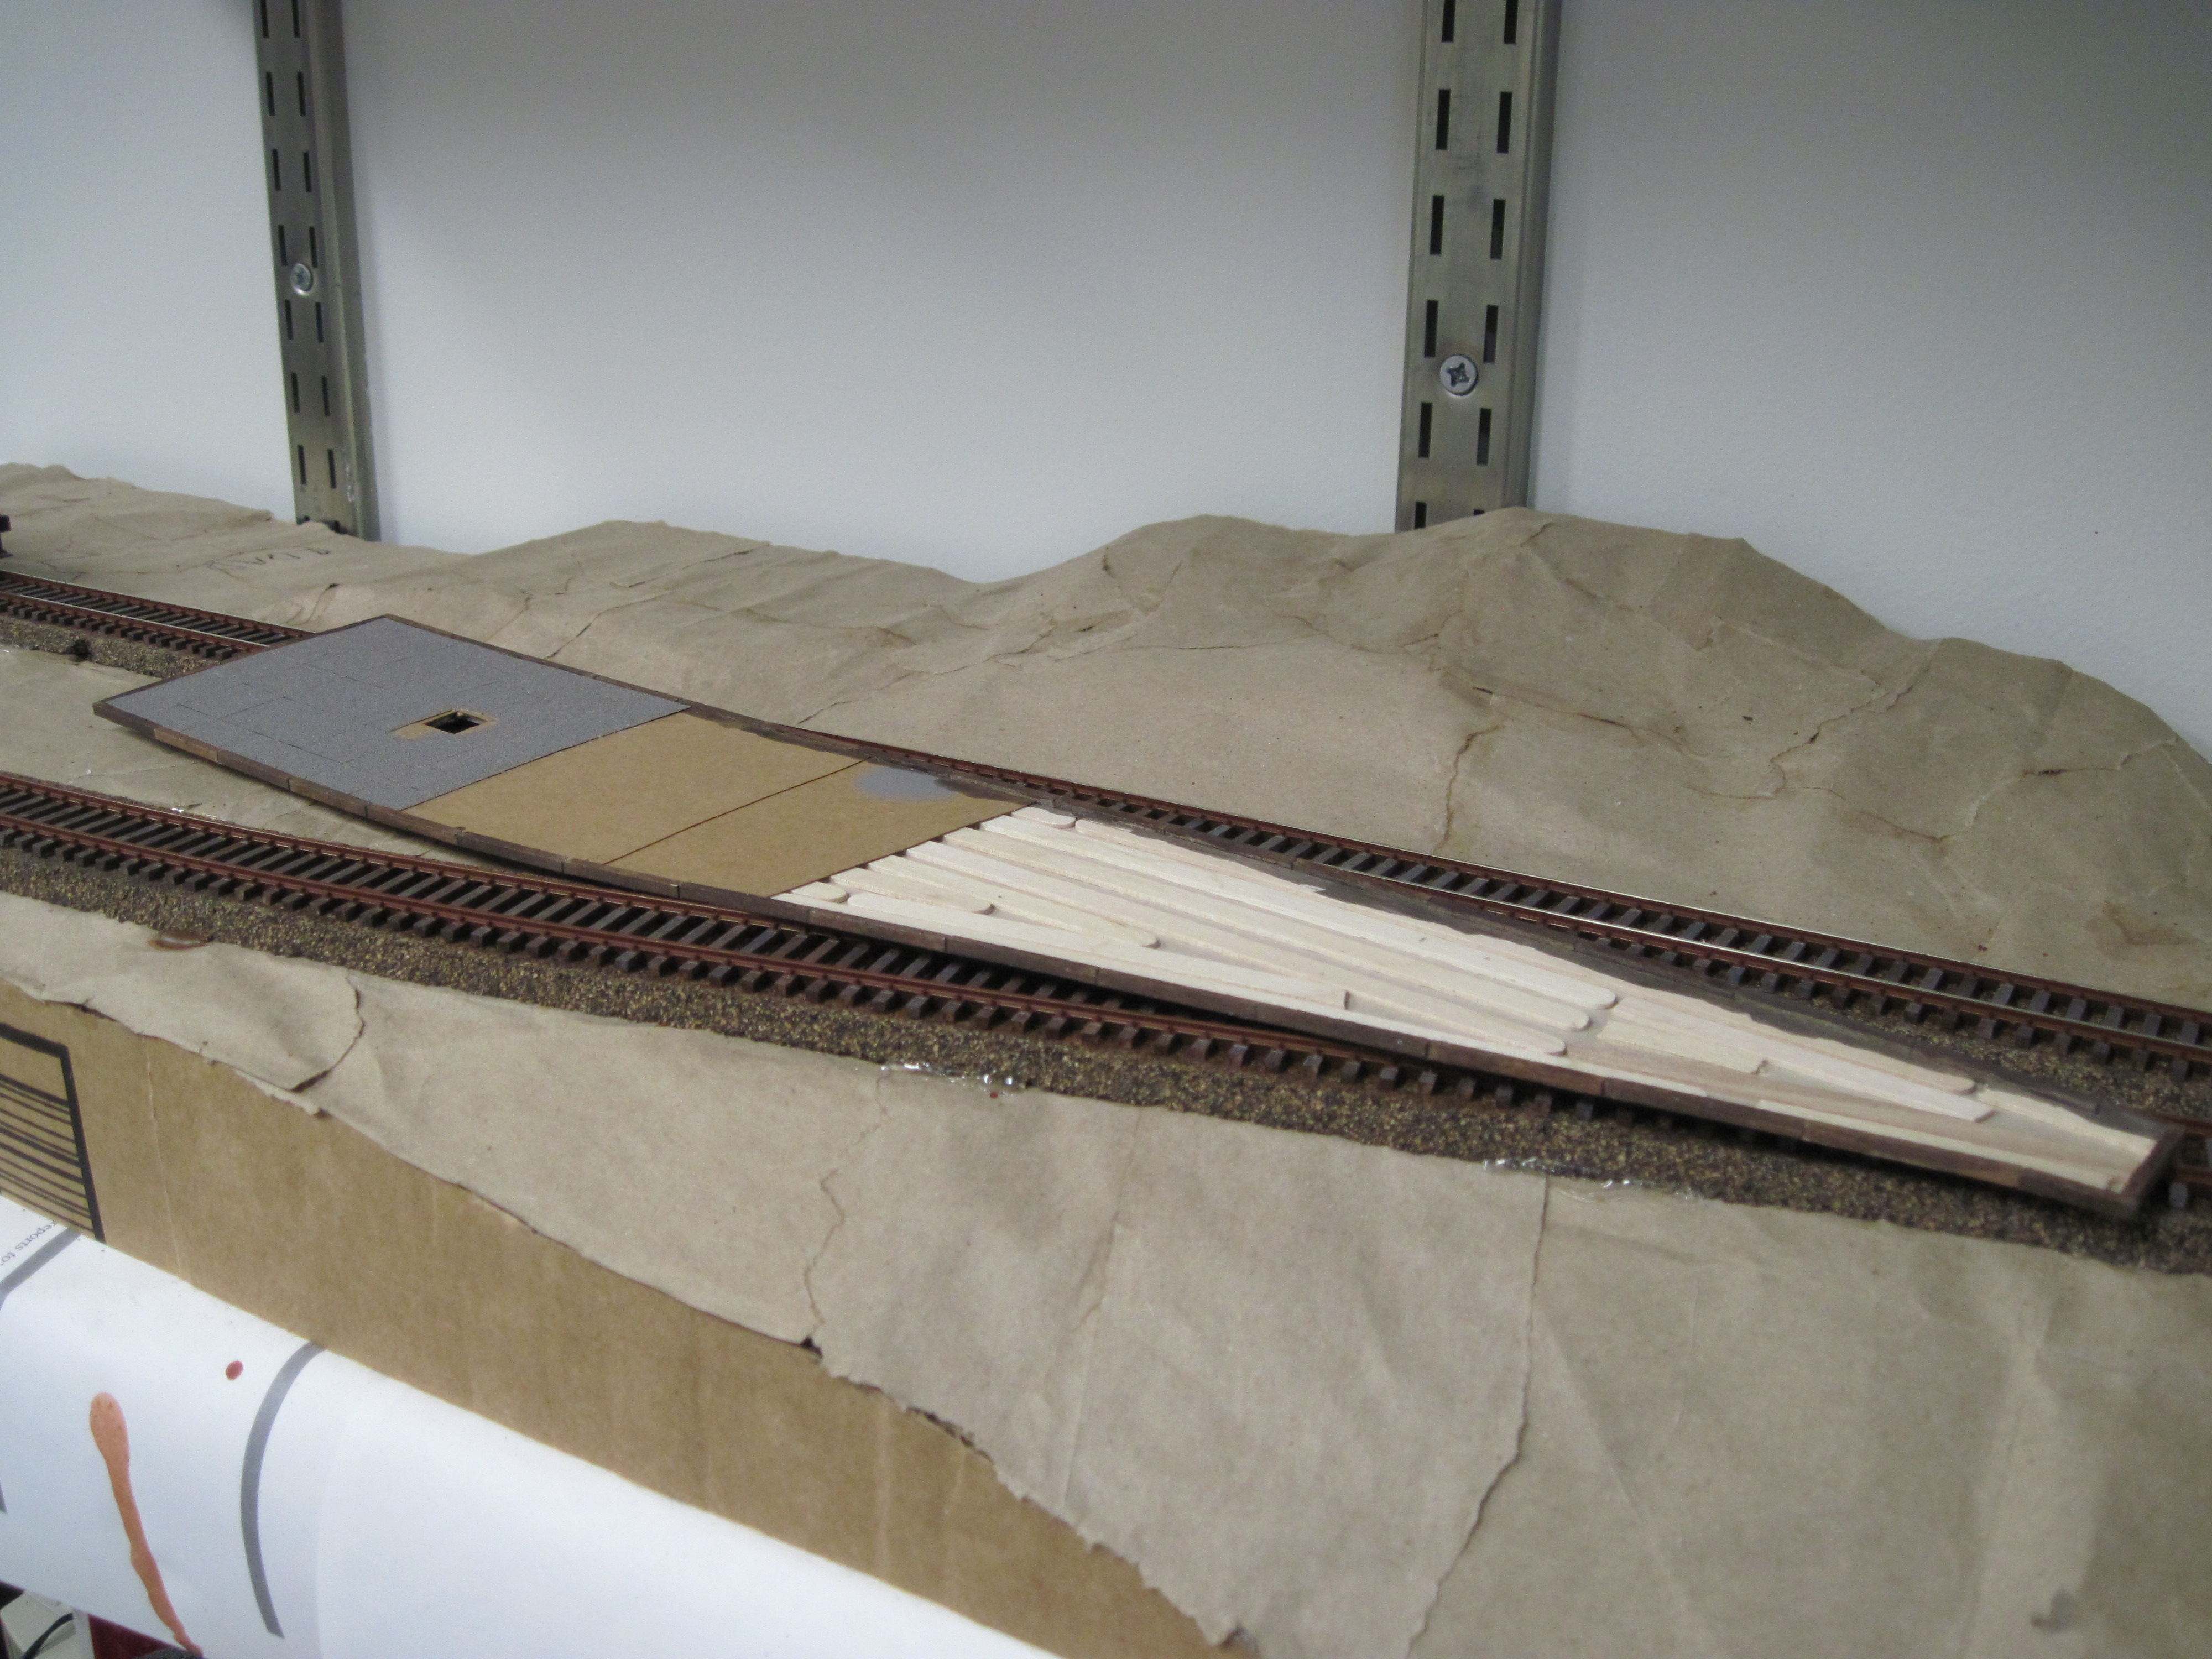
Before we can start spreading gravel, cinders, etc. around the tracks, we need to have the station platform in position. This is a photo of the layers of the platform under construction: cardstock/folder paper, coffee stirrers, strip-wood along the edges cut to the length of railroad ties and stained with watered-down paint, and grey-painted sandpaper for concrete. The strip wood and sandpaper are the first things I've had to buy for this project, but they're pretty inexpensive. (This is my second attempt at constructing the platform - on the first attempt I goofed up on the platform height. So if you visited this page earlier and saw a different photo, that's why.)
The gravel around the tracks is, unfortunately, one thing for which I haven't found an alternative to the "official" scale gravel sold by various companies. I've tried using sand, but sand is always full of annoying glassy particles that don't look real at all. (Luckily I did have some scale gravel among my leftover supplies.) However, the darker material under the gravel - representing a layer of cinders in the real world - is probably one of my weirdest cost-saving ideas yet: used coffee grounds!
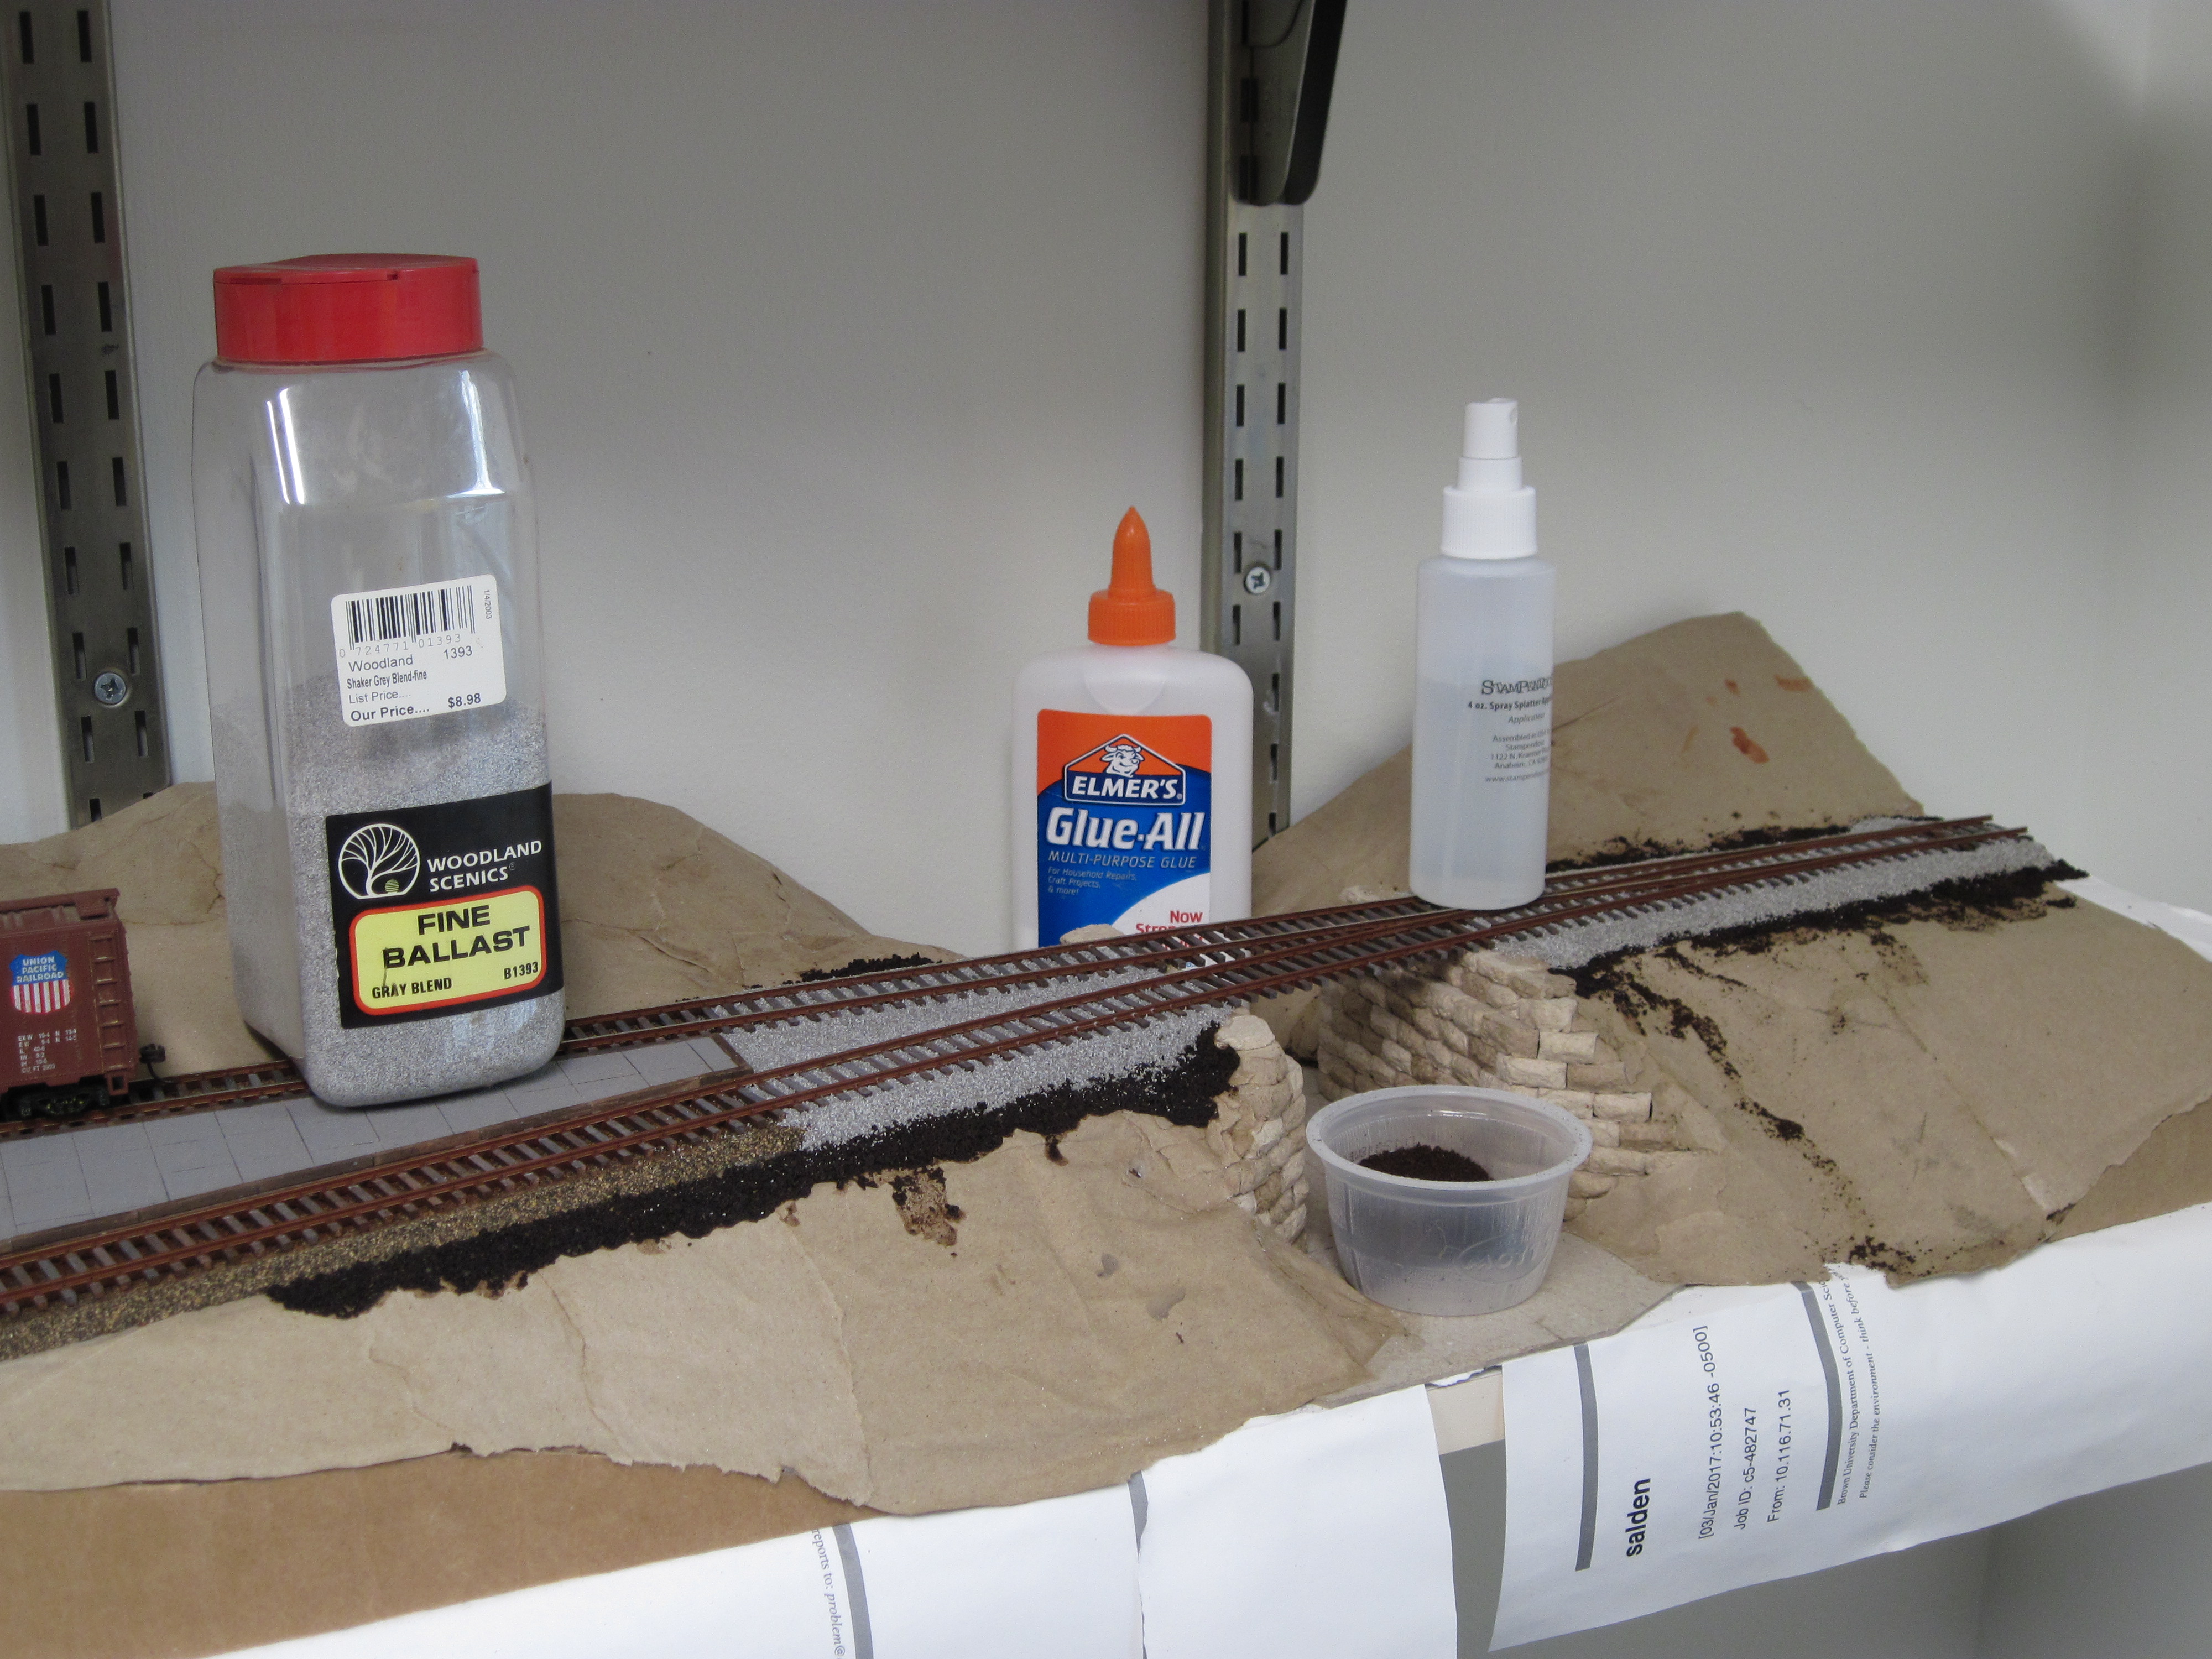
The process for afixing gravel around tracks is well documented elsewhere, but here are the basic steps: (1) Spread the gravel around the tracks with an old dry paintbrush. (2) Spray the whole area with a fine mist of slightly-soapy water (to avoid water surface tension) until the gravel is pretty wet through. (3) Pour on diluted white glue (I do 1:1 glue and water). (4) Take a toothpick and poke whatever bits of gravel floated loose back into place. (With the coffee-cinders, I mixed them directly into the watery glue until I had a sludgy paste and then just slathered it onto the ground, which I couldn't have done neatly if I was spreading it in between the railroad ties.)
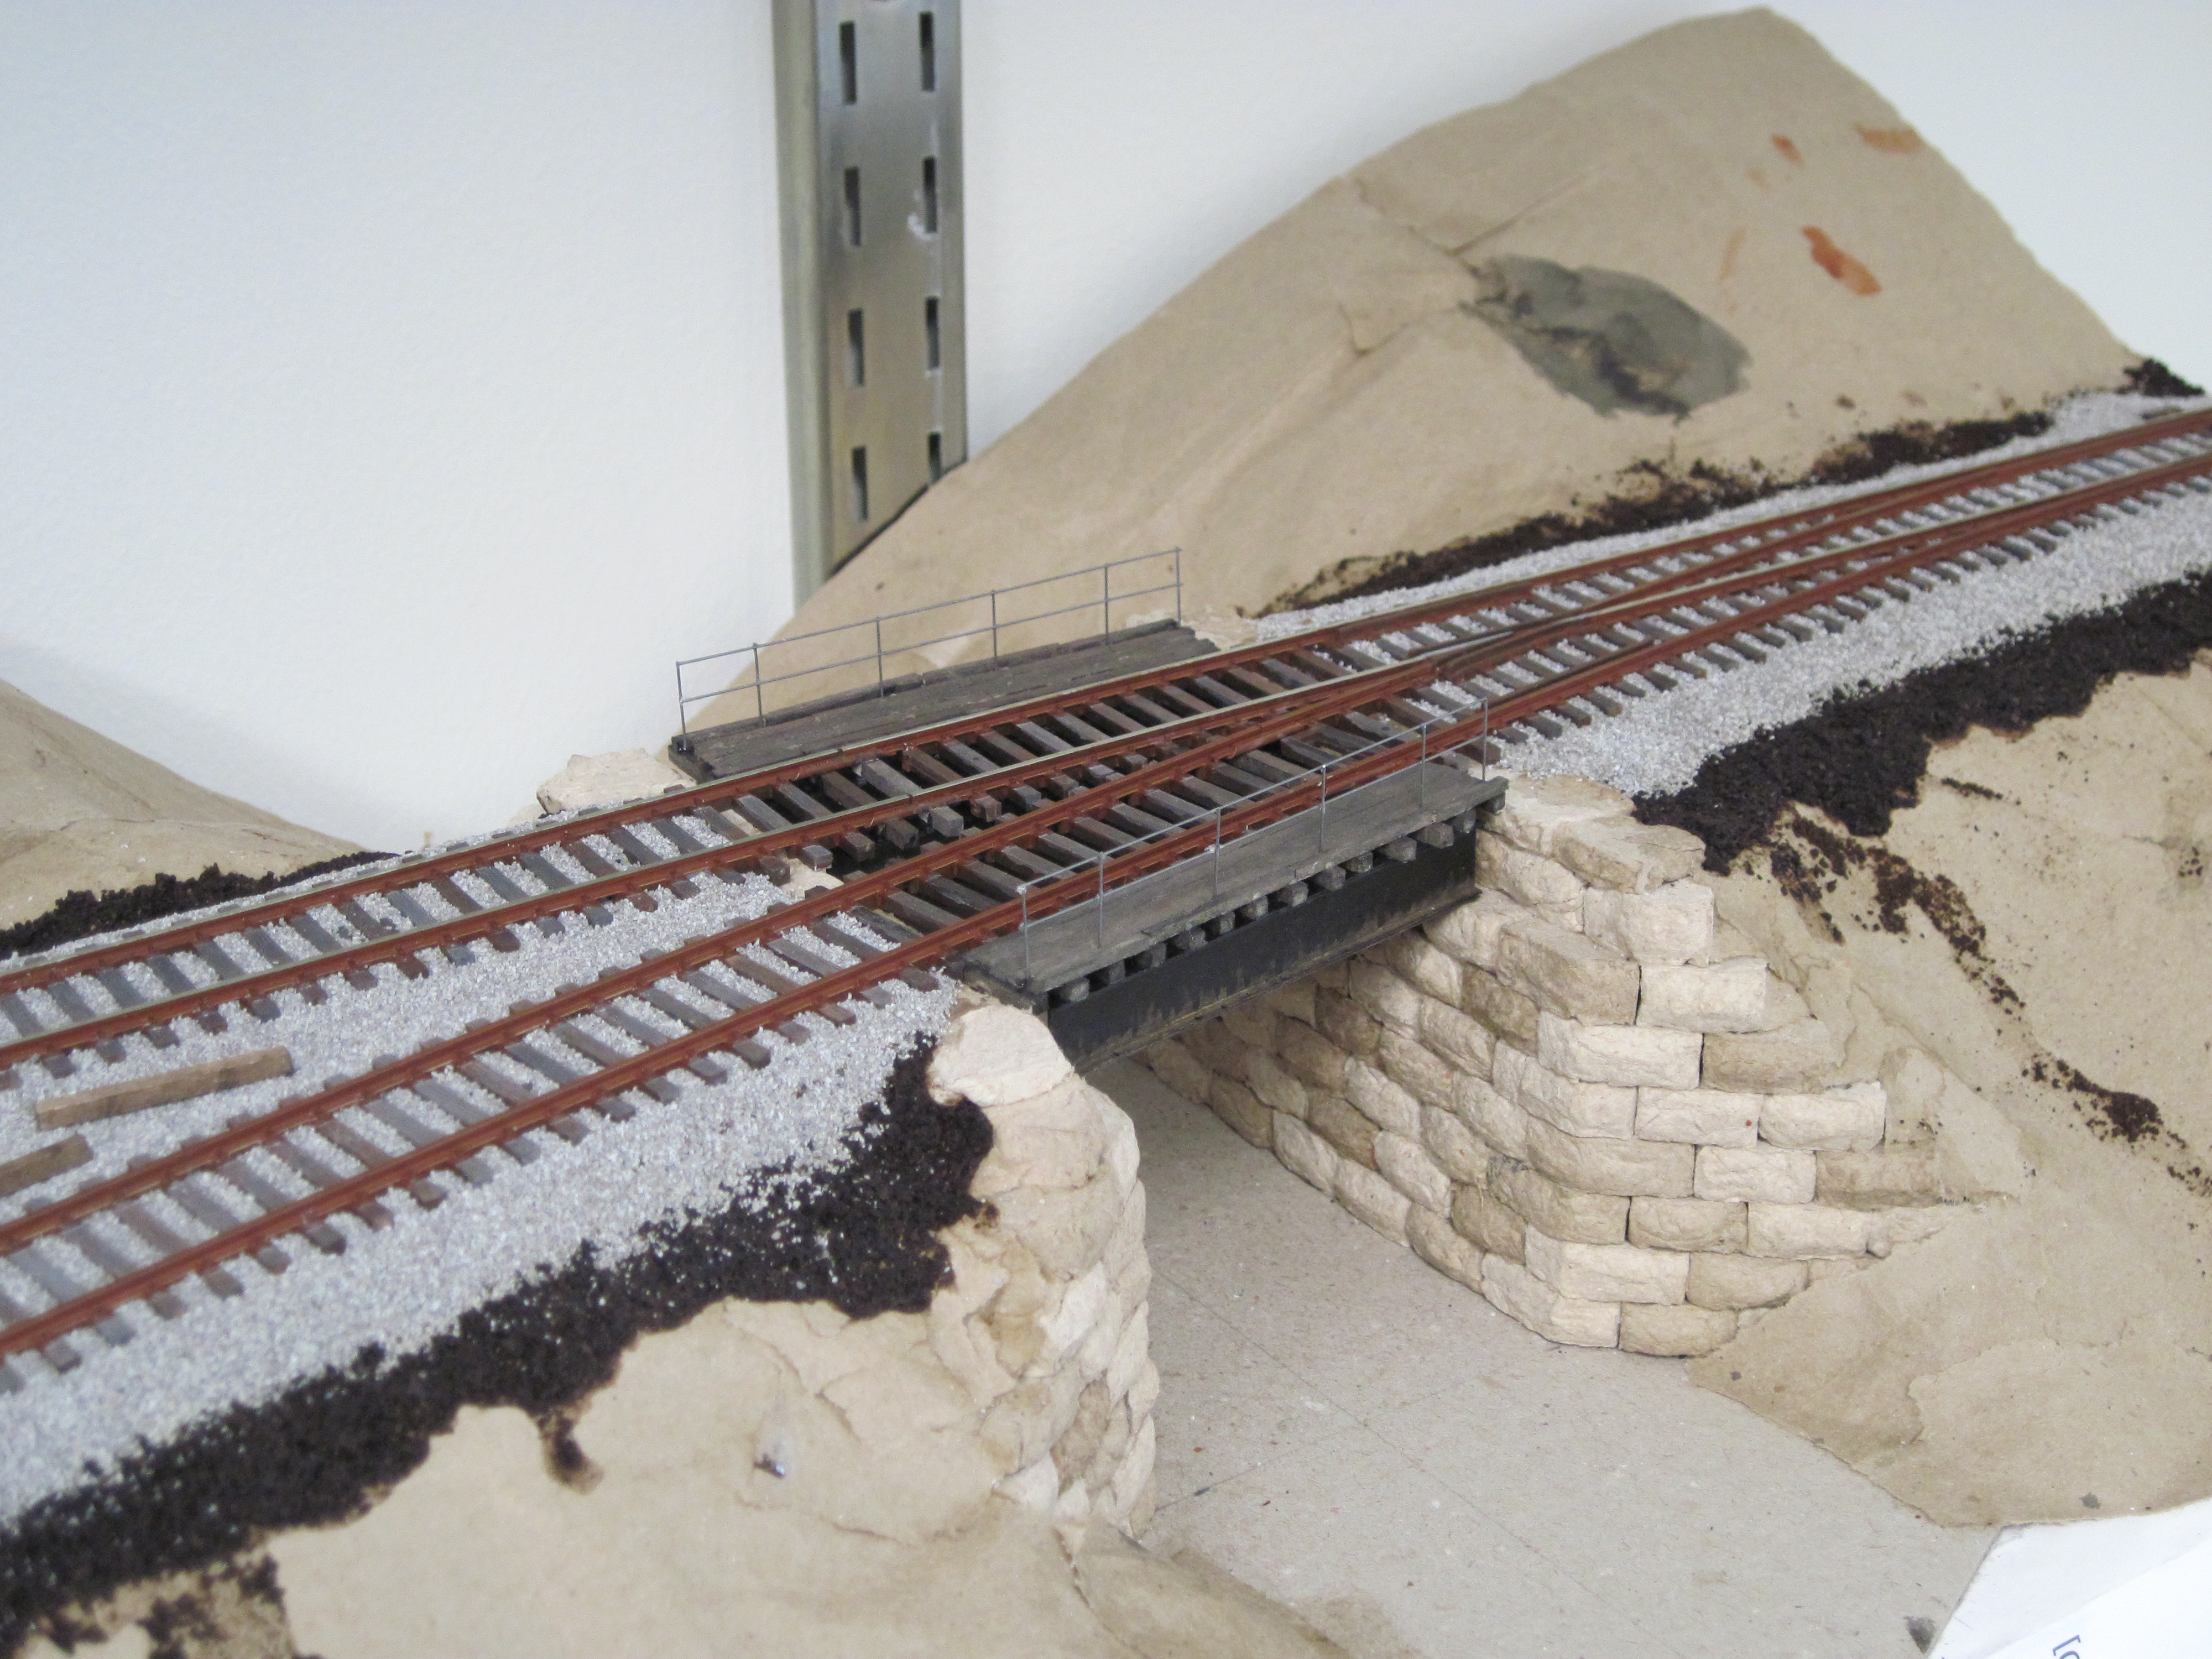
The tracks have been sort of hanging in mid-air over the brook for a while, which has bothered a few visitors. Let's put in a proper bridge. I made some I-beams out of brown folder cardstock and then stained them with diluted India ink, letting enough of the brown show through to suggest rust at the bottom. The handrails I made out of steel wire - in the picture you can see how I taped the wires to a piece of cardstock to hold them in the right position while the glue dried. The rest is all bits of stripwood.
Here's the completed bridge. I discovered after it was all glued in place that I had made the side walkways too narrow, so that the clearance between train car and guardrail is too close to allow a person to stand on the bridge while a train goes by. Oh well, I'm not redoing the bridge at this point. I'll make some tiny DANGER DO NOT WALK NOR TRESPASS ON BRIDGE signs eventually.
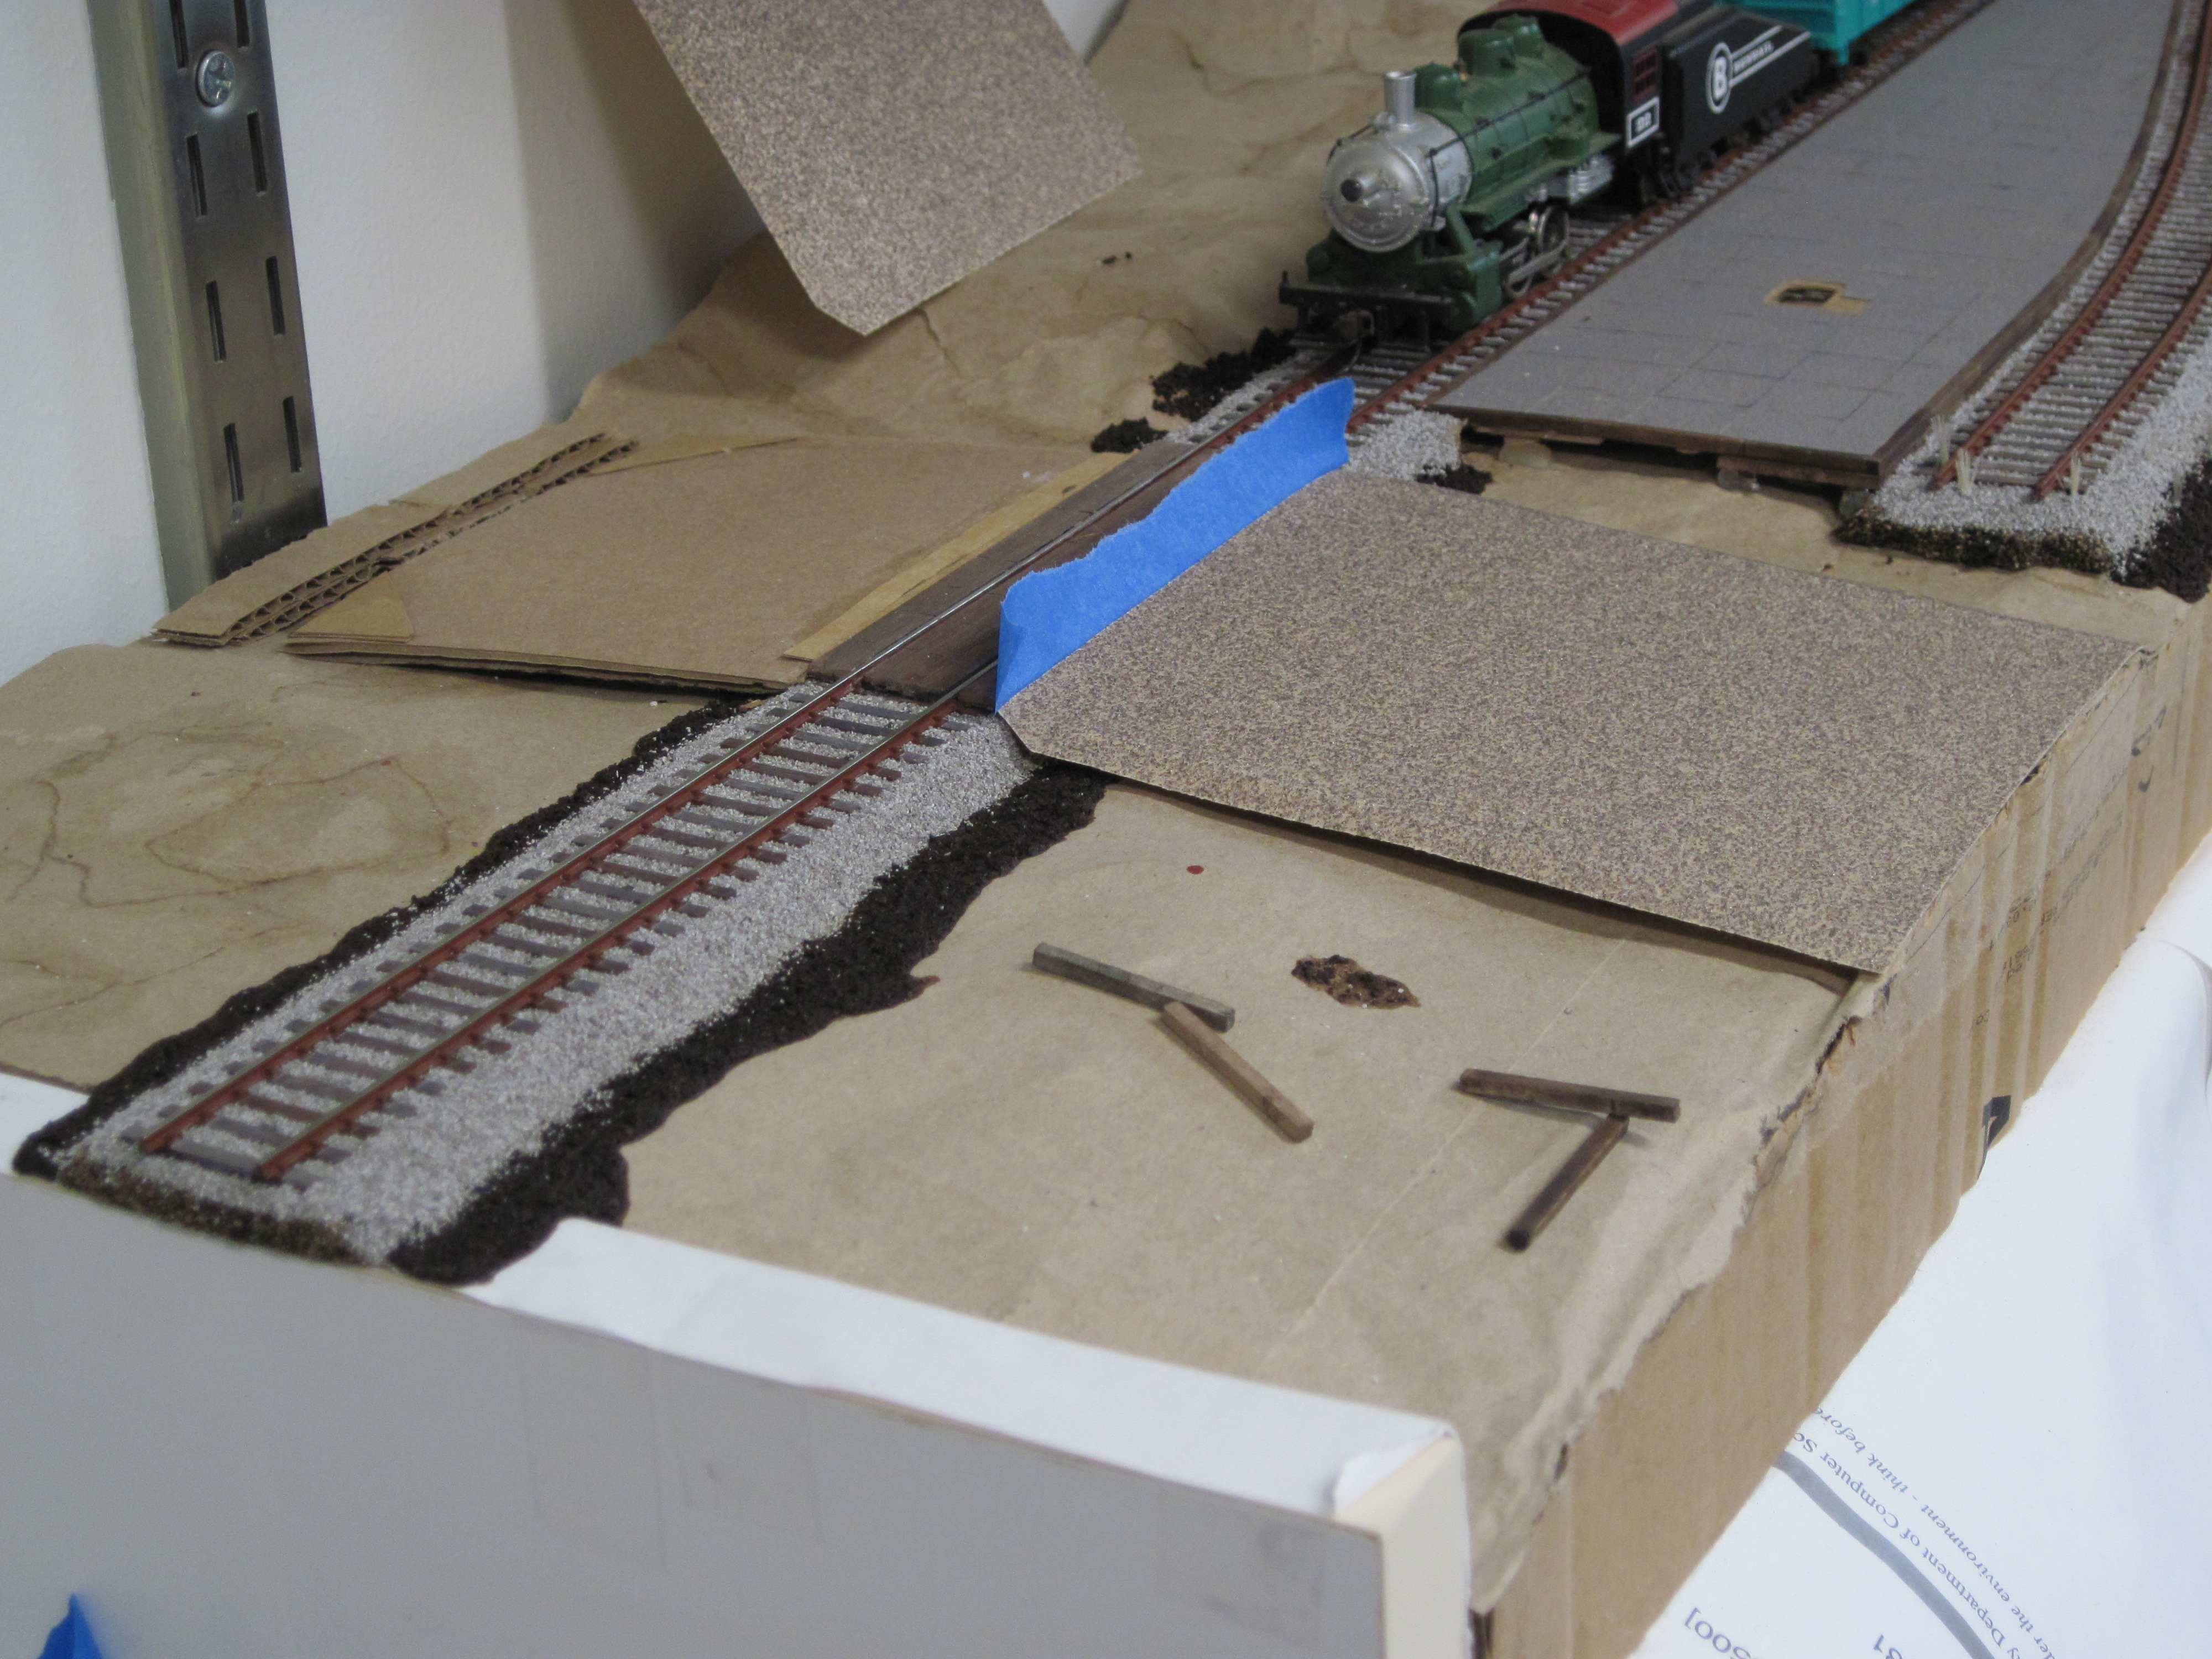
At the other end of the shelf, here's the road under construction. Stained stripwood for the crossing planks, layers of cardboard to build the road up to the right profile, and then sandpaper (shown here before painting to resemble blacktop pavement).
September 2021: Been working from home for a year and a half due to The Plague but supposedly returning to the office this month. One thing I really want to add is working railroad crossing lights, and that's something I can get a jump start on from home. (I suppose animated gates would be even nicer, but that seemed like overkill for this quiet branch line.) I had a bunch of old electronics components lying around, including a 555 timer, so I looked around online for a simple circuit to flash crossing lights and found this. I'm not sure whom to credit this to - I found the same basic formula on several different websites, but the voltage / resistor / capacitor values differ between versions.
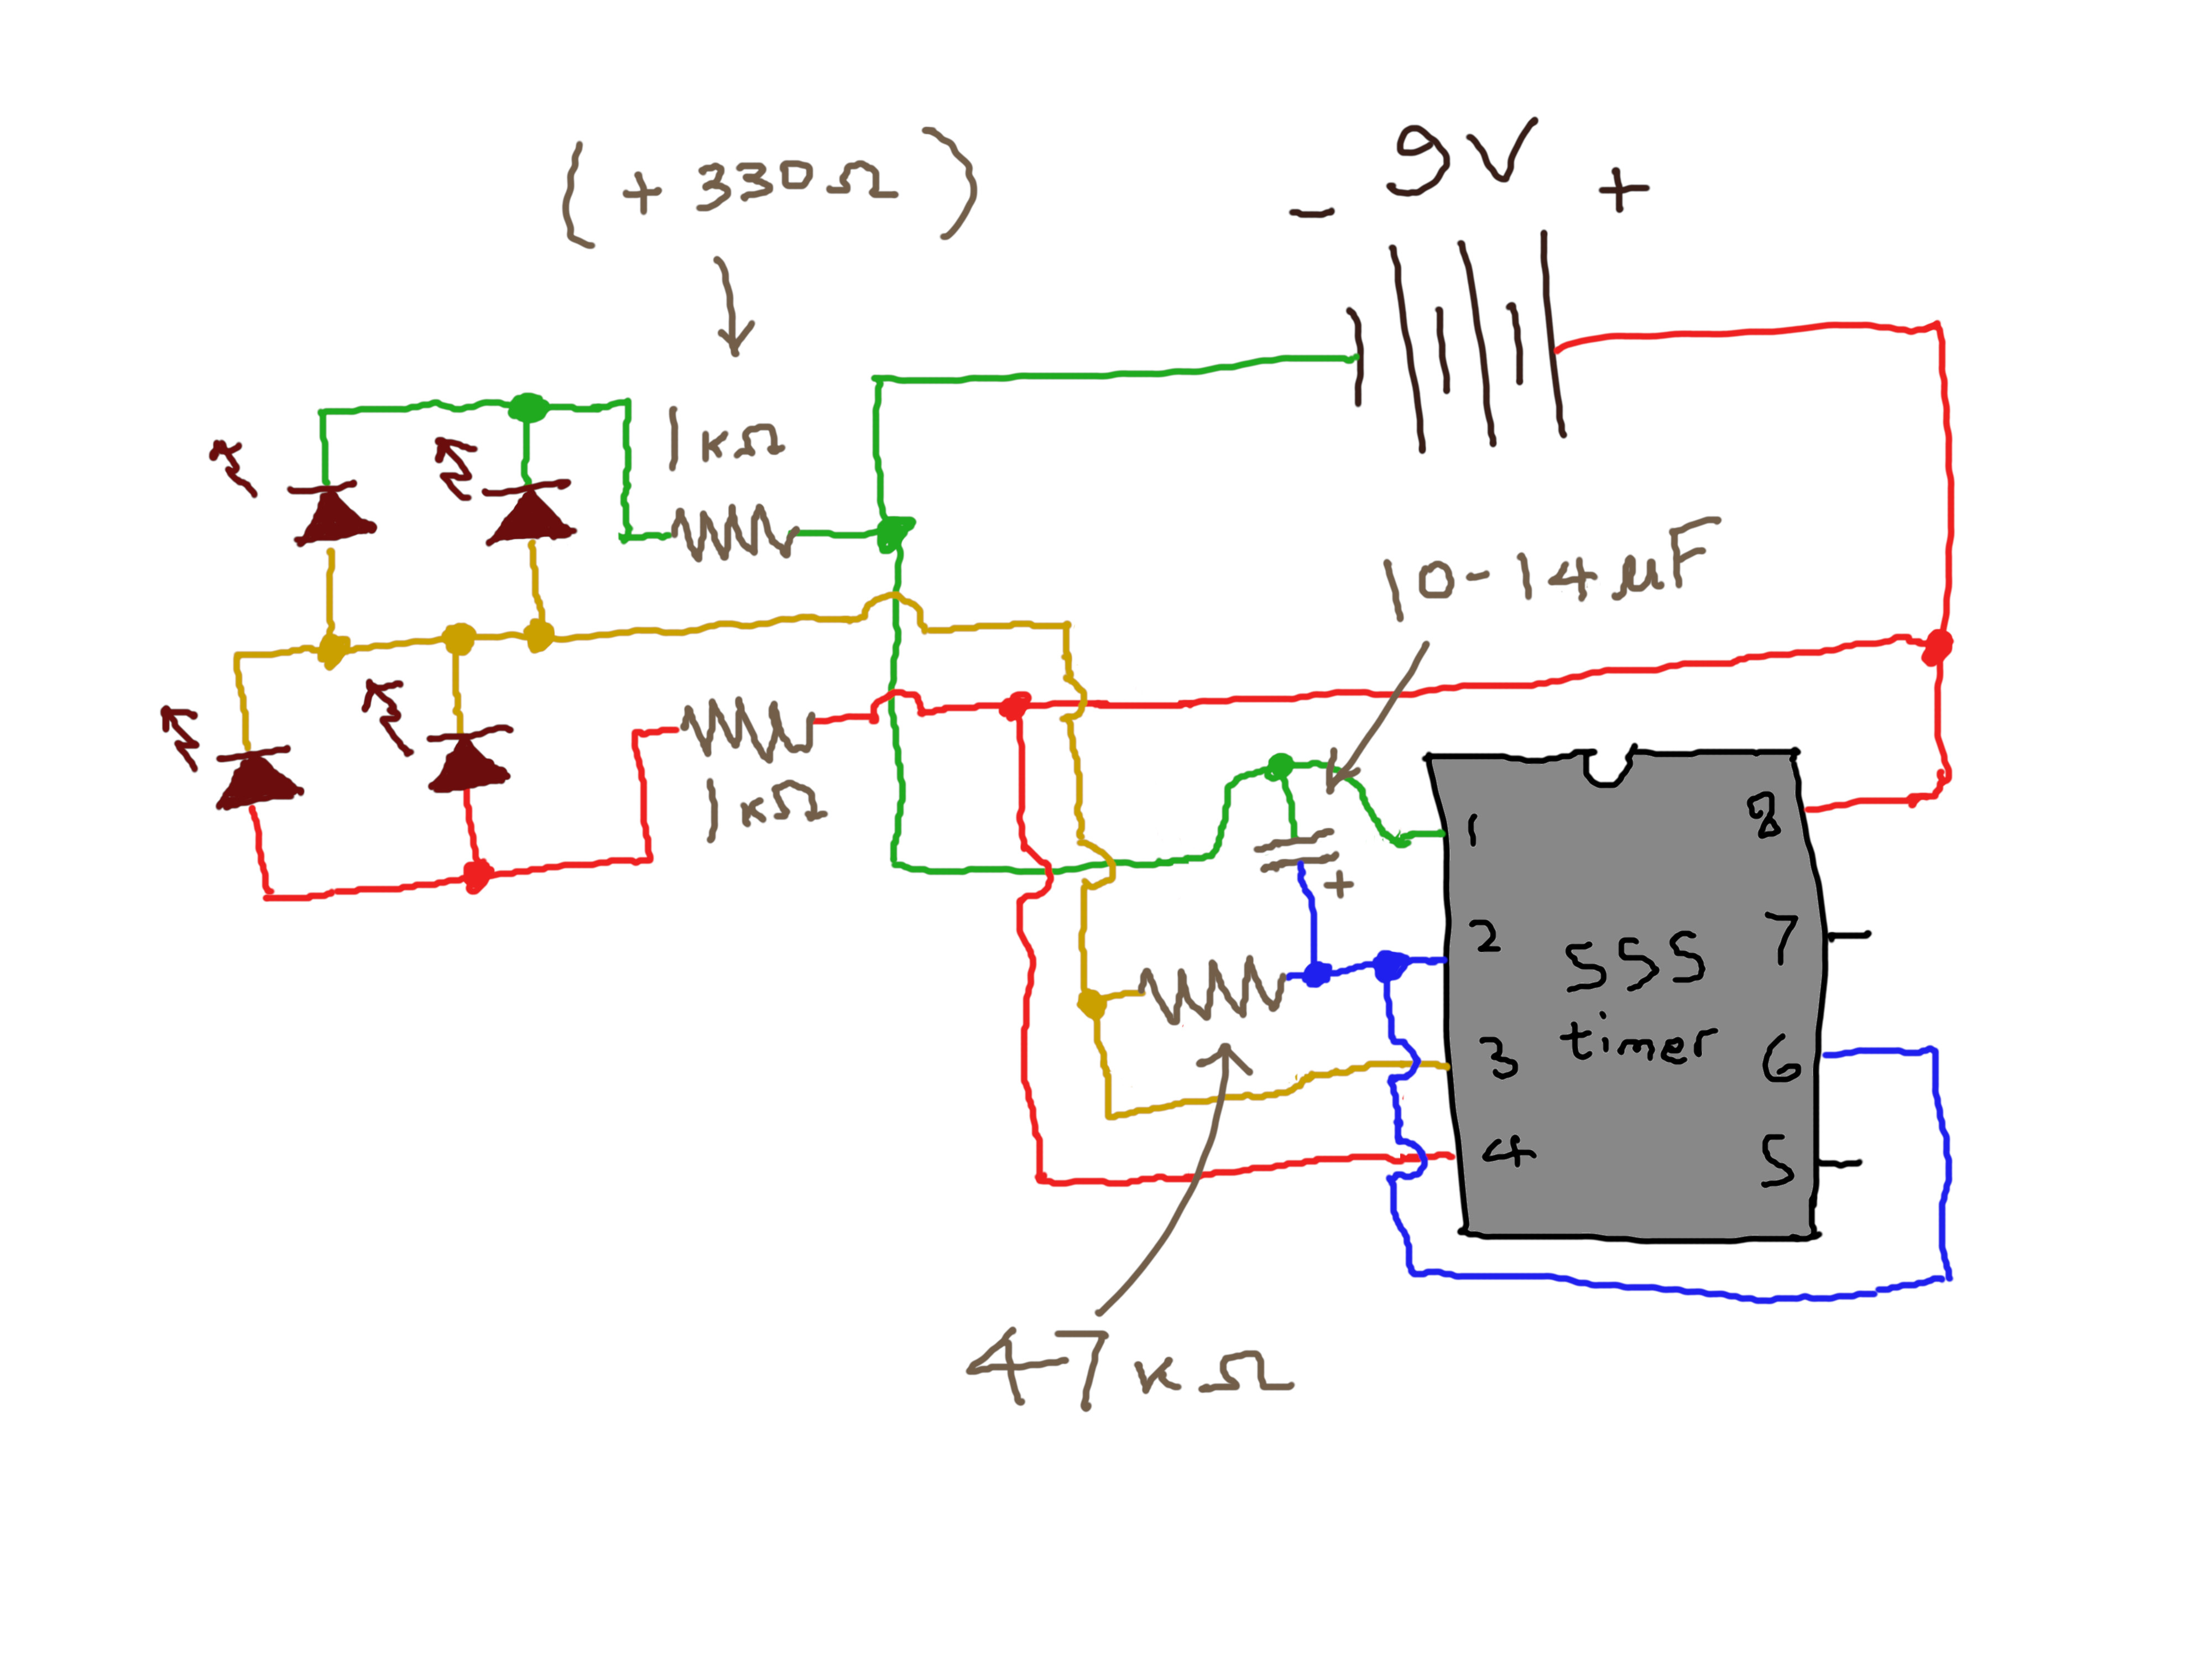
I had to play around a bit with different resistors and capacitors to get the timing about right. Following the recipe exactly (aside from adding an extra two LEDs), I discovered that one pair of LEDs stayed on for 1.5-2 times as long as the other pair. I assume this has to do with the capacitor charging and discharging at different rates. I was able to get the timing closer to equal by adding an extra 330 ohms where I indicated in the circuit diagram, but then one pair of LEDs ended up slightly dimmer than the other. That's a trade-off I'm willing to live with, though. I also had to use two capacitors in parallel to get a total of 12.2 microfarads.